Search Content
181 results found with an empty search
- AI & Me: Nicola's Honest Journey from Skepticism to Excitement
Nicola here, CEO at PowerApps911, sharing my honest thoughts on AI – I'm both thrilled and a little terrified. If you're leading an organization, a department, a team, or working in product development, you've likely been thinking about AI and its potential to boost productivity or enhance your product/service. I know I have. Initially, I felt like many of you – a bit hesitant but happy to use ChatGPT for things like content improvements, brainstorming games for team meetings, or drafting PTO flyers for school. This was easy to jump into since I spend around 14 hours a day with Shane, who brings up something AI-related at least once an hour 😊. I loved the productivity boost, especially since ChatGPT helped in areas that aren’t my strong suit, but I still didn’t quite grasp the game-changing potential. Then, the team working on our AI services asked us to brainstorm problems and inefficiencies in our organization that we’d love to solve. I was hesitant at first, still unclear on AI’s unique capabilities. I even asked, “How is this different from the solutions we already build with the Power Platform?” Their answer? AI doesn’t just follow instructions – it can interpret data and provide insights. Unlike standard automation, AI can think critically about the data it processes and give meaningful answers. And then… the wheels really started turning. I began thinking about areas of our business I’d love to make more efficient to better serve our clients and create a better work environment for our team. Some ideas were: Creating a solution to simplify time entry. We’re a time and materials-based consulting company, and as much as we might wish to avoid timesheets, they’re essential. Making that process easier for our team would be fantastic! We have a lot of meetings; maybe AI could look at calendars and suggest (or even prepopulate!) time entries based on meeting data. It could analyze historical patterns and recommend or prepopulate entries, streamlining the whole process. Improving the resource shuffle. If you manage resources like we do, you know the challenges of adjusting as projects delay, new projects arise, or skill needs change. We have a solid resource management tool and a team of skilled project managers juggling resources constantly. But what if AI could make it just a bit easier? Imagine AI recommending resource shifts that optimize skills and availability or suggesting allocations based on our project pipeline. Before this brainstorming, we were working on an internal project to make it easier to identify completed projects similar to new opportunities. In many organizations, this information is stuck in people’s heads. Someone asks, “Have you ever done a project that uses XYZ?” and we rely on team memory, sometimes asking everyone to find an answer. We tried solving this by tagging documents with skill and technology information and short project descriptions, but with a backlog of projects dating back to 2018, it was slow going. Then Daniel LeMay, one of our AI experts, stepped in and suggested AI could solve it faster and better. Now, he’s working on a solution to analyze all our past project content and automatically tag new ones as they’re completed. These are just a few examples. Once I fully grasped the possibilities, I quickly came up with ten ideas. If you're like me and need a quick discussion with someone to understand AI and its potential, contact us . We’re excited about what AI can do, and we’d love to brainstorm with you. If you decide to move forward with AI, we offer AI Services and Training – we can build for you or teach you to build. We’re here to be the partner you need.
- Power Pages: A Simple and Secure Way to Build Web Pages
Interest in Power Pages as a solution has become one of the fastest growing requests from our clients. And it is pretty easy to see why. Need a student registration website? An ordering portal for your vendors? A scheduling tool for subcontractors? Power Pages offers a secure solution for external users and connects seamlessly to your Dataverse environment. If you have processes that involve people outside of your company and right now rely on manual processes (email!), then consider Power Pages. Yes, there are licensing costs, but we ran some ROI numbers for our own org and building a Power Pages solution will ultimately save us time and money! But how low code is it? Power Platform is working to make application development accessible to people with little to no coding experience, and Power Pages is no exception. However, it is not quite as low code as some of its companion tools. As the child of Dynamics 365 Portals, Power Pages is built on Dataverse and is essentially a model-driven app on the back end. In its current form, you can only achieve so much with out of the box functionality and will need HTML, CSS, JavaScript and/or Liquid to go further. Currently, organizations can make very basic pages using low-code and need to leverage full dev to create more sophisticated interfaces. The Microsoft team is working to include more and more Power FX to Pages , which is great news, but it is still in the early stages. You can build for two different types of users: Authenticated or Anonymous Building for Authenticated Users Power Pages Authenticated users are users who obtain secure access to your website by logging in through an authentication provider website. More simply put, authenticated users are logged in to your website. Before you decide to start building for authenticated users, understand how you want each type of user to use the site. We call this, user roles. User roles help define what each type of user can access, view, and modify within the website. By establishing clear roles, you can tailor content and features to specific user needs, ensuring that sensitive information is only available to authorized users. When planning a Pages project, map out who will use your solution, and the different functions they will perform. Identify what tables in Dataverse they will have access to and make a plan to configure and test each users access role as you develop. Keep in mind that security in Dataverse is not relevant to Power Pages. It has its own thing which operates on the account and contact tables. By carefully planning user roles and enforcing security measures, organizations can create robust, secure websites that serve your audience’s needs without compromising on safety or compliance. Anonymous Users and Power Pages If you have no need to restrict the content to only certain users, then building for Anonymous users might be the right way to go. Anonymous access does not require users to log in. In these cases, your user role planning is focused on one user type- everyone. Even though user roles for anonymous users may seem simple, it is important to carefully plan and control what information is accessible. While sharing event details and documents is straightforward, it’s essential to ensure that sensitive data or internal resources are restricted and properly secured. Defining clear boundaries for anonymous users helps maintain the integrity of your organization’s information while still providing a user-friendly experience. Ready to build? Join our live three day workshop , November 12-14 (only $650!!), which will give you all the tools you need to get started with Power Pages. If you are still not sure, check out these videos or just reply to this email and ask us a question. Intro to Power Pages ( youtube.com ) How to Configure Power Pages for Item Redirection ( youtube.com )
- Which SharePoint form are you using?
Welcome to our in-depth guide on leveraging SharePoint forms, Microsoft List, and Power Apps to enhance your data management processes. In our latest video, we dive into these tools, exploring their features, benefits, and limitations. Whether you're new to SharePoint or a seasoned user, this guide will provide you with valuable insights to optimize your workflows. If you want to see all of the tools in action this check out this video on Getting SharePoint Data? Use the right tool! SharePoint Or Microsoft Lists default form The Built in Experience When you create a SharePoint list whether through the SharePoint or Microsoft Lists experience, there is automatically an included experience to Create, Edit, and View your SharePoint data. With that default form you can make some tweaks by using JSON. It let's you make them look a little different but doesn't really change their functionality. Still, sometimes that is all you need and if so cool. It has literally worked for millions of people over the last 20 years. Understanding SharePoint Forms The New SharePoint Forms Button Recently, Microsoft introduced a new forms button in SharePoint, aimed at simplifying data collection. This feature is perfect for quickly setting up forms without needing extensive technical knowledge. However, while it's user-friendly, it comes with some limitations, such as lack of advanced customization and branching logic. Also, keep in mind these forms only work when you send someone the link. They don't change the default SharePoint experience. You cannot change the look and feel much but collecting data simply is where they shine. Use Cases and Limitations Quick Data Entry: Ideal for simple data collection scenarios. Security Considerations: Allows data entry without requiring users to have access to the entire list, which can be useful in controlled data collection environments. Leveraging Microsoft Forms for Data Collection Introduction to Microsoft Forms Microsoft Forms is a versatile tool within the Microsoft 365 suite, designed for creating surveys, quizzes, and forms. Unlike the other tools discussed, Microsoft Forms is not directly tied to SharePoint, but it offers a flexible and easy-to-use interface for collecting data from both internal and external sources. Features and Integration User-Friendly Interface: Microsoft Forms provides a straightforward setup, allowing you to quickly create forms with various question types, including multiple choice, text, and more. External Access: One of the standout features of Microsoft Forms is its ability to collect data from external users, making it ideal for public surveys or feedback forms. Data Storage: Data collected through Microsoft Forms is stored in an Excel file, which can then be integrated into other tools or systems using Power Automate. Limitations and Considerations No Direct SharePoint Integration: While Microsoft Forms is excellent for collecting data, it does not natively integrate with SharePoint lists. This means that additional steps, such as using Power Automate, are needed to transfer the data into SharePoint. Customization Limits: While it offers basic customization, Microsoft Forms does not provide the same level of control and customization as Power Apps. Advanced Customization with Power Apps Power Apps Integration Power Apps is the go-to tool for creating highly customized forms and applications that interact with SharePoint data. It provides extensive capabilities, allowing users to create complex, multi-step workflows and custom interfaces. With Power Apps there are two ways to use it here. First, you can use it to make SharePoint better by replacing the SharePoint default form. This will replace that default SharePoint form with one you build in Power Apps. Making the SharePoint Browser experience better. Second, you can build a complete standalone custom app, and have it save data directly to SharePoint. This works great in those complex business scenarios. One of our specialties here at PowerApps911. Pros and Cons Customization: Power Apps offers unparalleled customization, from simple color changes to complex data manipulation and workflow automation. Security Requirements: Requires proper permissions for users, making it less accessible for broader, anonymous data collection. Choosing the Right Tool Choosing the right tool depends on your specific needs: For simple data collection: The new SharePoint forms are quick and easy to set up. For a more user-friendly interface: Microsoft List offers a clean and straightforward experience. For a flexible experience you can use anywhere: Microsoft Forms allow a host of security options, including anonymous but do require you to build a Power Automate flow to get data into SharePoint. For advanced customization: Power Apps is the best choice, providing a comprehensive suite of tools for building sophisticated applications. Comparison Table To help you choose the right tool, we created a table comparing the options: Conclusion Our goal at PowerApps911 is to help you navigate the complexities of Microsoft 365 and the Power Platform. If you have any questions about these tools or need assistance with other Power Platform or Microsoft 365 solutions, we're here to help. Just scroll down and fill out the contact form, and one of our experts will be in touch!
- Automate HR Requests with a Chatbot built using Copilot AI and Actions
A lot of businesses are trying to find ways to pilot AI in their organization and for many of them trying out chat bots seem to be the answer. And of course, in the Microsoft ecosystem that means Copilot Studio, formerly Power Virtual Agents. The reason for the popularity of these tools now is their ability to use Generative AI. So instead of going in and defining 100 Human Resources questions and the answers manually now you can point it at your documentation and let it answer the questions using a large language model (LLM). Since most businesses have things like HR policies and procedures, PTO policies, and the Employee Handbook available to all employees in a SharePoint site today building a Copilot can be done in literally minutes. But the fun doesn’t stop there. The latest iteration of these chatbots can also easily include actions. You add actions for things like submitting a request for time off or requesting a meeting and the AI can take those actions for you. This allows for an interactive and action-oriented conversation, a drastic improvement from the wall of text people are used to getting from HR documents. Is it Copilot or Chatbot? Yes. 😊 To build these things we traditionally called chatbots you use Copilot Studio. In Copilot Studio you build a copilot, which we used to call a chatbot. So for this context Copilot and Chatbot are interchangeable. I use both throughout the article to hopefully drive home they are synonymous. Demo of an HR Copilot with Generative AI Since we receive a lot of requests for this specific use case, I built a demo bot to show off some of the cool. Below I will walk you through the key features with screenshots. If you want to see the Copilot in action, then check out this video demo I did HR Assistant Copilot using Copilot Studio for all of the fun. For this Copilot I built and published the bot as a Teams app. Copilot Studio can be used to publish to many different channels that are both publicly and privately accessible. But in case where you are looking to use internal content, like SharePoint, and you want to have authentication then publishing to Teams is the path of choice. Answering HR questions with Copilot Studio Alright, let's ask this bot something. How about an important question like “Can I bring my dog to the office?” Now in this case we have never trained the bot on this topic but the fine folks in HR have addressed it in our employee handbook. So, when the question is asked the Copilot looks through the handbook, finds our pet policy and responds with the appropriate answer. Notice the blue colored 1s at the end of the response. These are the links to the documents that Copilot referenced to come up with this response. So, if you want to dig in deeper or just validate things before you purchase your pup some business attire you can click the link and you will be taken to the document. Now you can see where the pot belly pig stuff came from, not AI’s imagination but from the actual policy. 🤣 Maybe I shouldn’t be in charge of HR. Fun pigs aside, this is really powerful. By just giving Copilot access to the proper content, it is able to provide accurate answers to random questions and provide attribution so you can validate those responses. And look, all I did to set it up was give the Copilot a link to the SharePoint site and made sure everyone had access. That was it. And while SharePoint seems to be the default in our Microsoft 365 based world, there are a lot of other supported data sources in preview right now. Providing a structured response via Topics Now sometimes you don’t want Generative AI to provide an answer, you want to specify exactly how a conversation goes when they ask about a specific subject. In this case you will provide a topic. When a user asks a question topics to take precedence over generative AI. In this case, if they ask anything about getting a raise, I want to simply redirect them to the manager or HR. With topics you can go anywhere from this simple response to full on multi-step conversation with conditions and actions. You could ask them for additional info, you could trigger a flow or action to get more information or submit a ticket, etc. All of the traditional chat bot activities. Add a new employee with a Power Automate action Okay, so far, we have just gotten information but what if we want to take action. You can add actions and/or Power Automate cloud flows to your copilot. When you add them you give it a description of what the action can do and then Copilot will use AI to determine when to invoke to action and how to get the inputs the action may require. For the example of creating a new employee I wanted to add a record to my SharePoint list. I started by creating a flow that is triggered by Copilot and has 4 inputs. These inputs will be used as dynamic content within the flow. Now we add a SharePoint Create Item action, configure the site and list, and then fill in the fields with the Dynamic content. And finally, we set the flow to respond with a message back to Copilot to let it know you are done. Perfect, the flow is ready. Now you add it as an action to your Copilot. As part of adding it you will then tell it how to get the information for each of the inputs. The default, let Copilot figure it out and prompt the user as needed, works great. If you need more, there is extensive customization options available. Same deal with output. You can configure a message saying “Success” or let AI generate the appropriate response or just not respond with anything if it isn’t necessary. Now that you have configured the action the chatbot will call it as necessary. Here you can see I asked it to create an employee and since I provided no other context Copilot asked for the inputs. If you are enjoying this, then be sure to check out our training classes for both Copilot and Power Platform . We have both on-demand and live classes available to help you learn. But, if I ask it to create a new employee and provide all of the context it needs, then it will just do the action. I think the coolest part of that is it understood that Buddy Young was the full name, and it broke it into First name and Last name properly when it created the record in SharePoint. 😲 Remember, I didn’t write any logic or explain to copilot this was what to do. It understood the context and did it itself. This is the power of generative AI at its finest for me. Conclusion Using Copilot Studio to build a copilot or chatbot from existing content today is a powerful first step into bringing AI to your business. And the flexibility of generative AI, topics, and actions allows you to build so much more than we could before. Even if you are thinking “I am not ready to do this yet” I encourage you to dig into Copilot Studio. I think it will play a big role in our AI futures and those of us who have already embraced low code tools like Power Platform are primed to lead that charge. If you need help with this or anything else Copilot or Power Platform related let us know. Just scroll down and fill out the contact us form below. We have free help, quick help, dedicated resources, or traditional project services, all designed to help you be more awesome!
- Event Judging App
This week we are having the PowerApps911 annual get together. Our team is made up of people from all over and we all come together once a year for some good ole fashioned fun. One of the team building things we do is build a solution as a small team. This year, the challenge is to build something that makes the company better. Could be something we sell or something that improves an internal process. Me and a few others are responsible for judging these solutions and grading them across a range of criteria. And to keep it fair, we want each judge to score the event on their own by assigning points to the different criteria. And of course, we want things to be as flexible as possible so we can use it with different criteria or judges all while not having to rework the app. If this sounds interesting to you then follow along and I will give you a closer look. Or if you want to see then there is a full video walkthrough of this app here . In the video, I dive deep into each feature and functionality, showing you how to set it up step-by-step. Key Features of the Event Scoring App Below you will find a list of the various screens and some of their functions. Security The app is configured so only the Event Organizer, and the Judges have access. The Event Organizer has full access to all functionality while the Judges can only see the Score screen, they cannot see what other judges have scored the event nor can they see a team's total, just the scores they entered. Judges Setup The app allows you to configure judges using Azure AD Security Groups. This simplifies the process of granting access to judges, making it easy to manage permissions. By adding someone to the group, they automatically get access to the app. Scoring Criteria Configuration Setting up scoring criteria is a breeze with this app. You can define the criteria and their descriptions, as well as the maximum points available for each category. This ensures that all judges have a clear understanding of the scoring metrics. Team Management The app lets you manage teams by listing all team members and adding any relevant comments. This is particularly useful for keeping track of who is on which team, especially during large events. Both the Criteria and Teams screen are just simple Galleries and Forms, easy data = easy screen. Scoring This screen is kind of complicated to build so it is easy to use for the users. I had to go through a few testing passes with Nicola to get it to her liking. 😻 You start by choosing a team and click Start. This loads the criteria, and any past scores you entered into a collection. This part had to be very dynamic, if someone adds a new criteria everything must work, no hard coding. We do this with collections and a gallery to make an editable grid. All fields automatically update using OnChange so no saving required. There is also validation to make sure you don't award too many points. Once you are done scoring a team you hit Submit and it is pushed back to the data source, which is Dataverse for this app. Lots of little details shown in the video, this screen took the most time to build for me. Results Reporting Now we need to know who won. This screen is made up of a Chart control and then and HTML control. Making the HTML table in the bottom right also dynamic was very tricky, required nested Concat functions and a lot of elbow grease. 😎 In no shock to anyone who has been to the site before, the dogs won by a lot! Mobile Version Because I am a judge, and I want to score from my phone, I built a simple one screen app for scoring only. I built it in less than 10 minutes but literally copying and pasting from the desktop scoring screen and then just resizing. 🤩 Not beautiful but super easy! Get the App You can download this app and start using it for your own events. Just head over to our YouTube library and sign up to get access to the solution package. It includes all the necessary tables, security roles, and both versions of the app. Need Help? If you need any assistance with this app or any other Power Apps project, PowerApps911 is here to help. Just scroll down to the contact form on our website and get in touch. Whether it's training, consulting, or mentoring, our team is ready to support you.
- Pre-Built Power Apps offer budget-friendly solutions to complex problems
The challenge so many organizations face is that out-of-the box programs simply don’t meet their unique needs. Yet the cost and time build solutions from scratch is often prohibitive. So is there a middle-of-the-road option where a company can benefit from customization without the from-scratch price tag? Pre-built PowerApps customized for your organization Pre-built PowerApps developed by PowerApps911 offer the best of both worlds, where an organization can benefit from the economies of scale offered by purchasing a pre-built solution while enjoying the benefits of customization. A perfect example is our newly redesigned Bookings App which we’ve just released for deployment to YOUR Power Platform environment! It builds on the solid foundation of the original version released in 2023, with an updated user interface that is both familiar and innovative, providing time grid and list views that let users quickly visualize availability while also being able to filter resources based on location, amenities, capacity, and more. Our goal in creating this resource was to make it heavily customizable for both large and small organizations. You can adjust work hours; set up multiple locations, each with as many spaces as needed; assign amenities; and more! A photo gallery of each space can help users identify and confirm that the space they’re booking meets their needs. One of the great benefits of Power Apps is the ability to create custom solutions that are on brand, and we were sure to include that functionality even in a pre-built solution like our Bookings App. From the title of the app itself to your logo and color scheme, all are customizable so that your users enjoy the experience of a fully-customized solution while the organization benefits from a budget-friendly solution that’s available for immediate deployment. PowerApps911 offers several pre-built solutions like this one, such as our newly-released Expense Reporting solution that allows management of expense reports and receipts while providing customization options for approval thresholds and spending categories. Integrated Power Automate flows email those in the approval pipeline and various options for storage are available, including SharePoint (no premium licenses required) as well as Azure Blob Storage and SQL Server. You can learn more about these pre-built solutions, as well as our other products by contacting our sales team here or learn more about the Booking App in particular here .
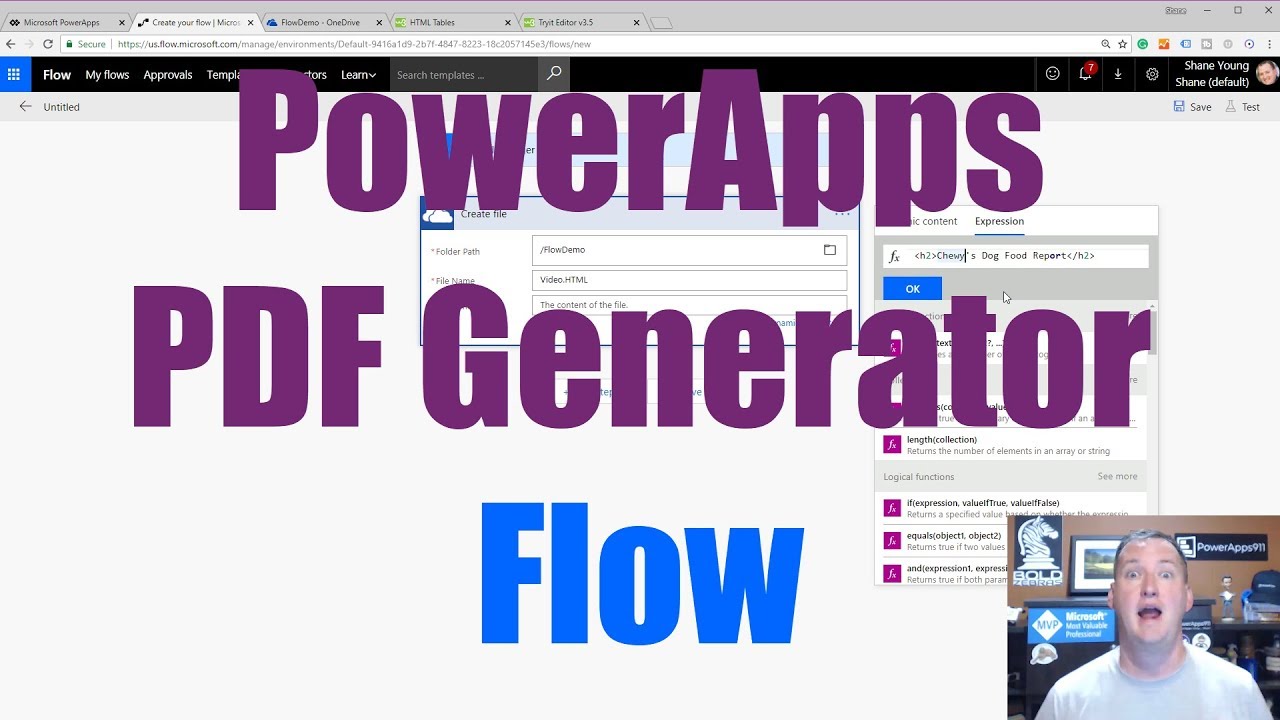
- Build a Power Apps PDF Generator with HTML, Flow and OneDrive
Do you want to make invoices or keep record of something in Power Apps? This video will teach you how to make HTML, utilize Flow and OneDrive, and send information from Power Apps directly to a PDF. In this video you will learn about: HTML generation The Concat function The DataUri expression Link to the video on YouTube: Power Apps PDF Generator using Microsoft Flow PDF Converter Link to the video for Curated Library subscribers: Power Apps PDF Generator using Microsoft Flow PDF Key timestamps: 0:00 Intro 2:04 Demo of the solution Shane demonstrates the PDF solution that he is going to build throughout the video which includes an image and Chewy’s Dog Food Report 3:08 Write the HTML, add it to Flow, and utilize the Concat function Write the HTML for Chewy’s Dog Food Report and create a new flow. A file is created within the flow and the Concat function is selected for the file contents. HTML is added within the parenthesis of the Concat function. The flow is run. An action is added to the flow to get the image onto the PDF. 9:21 Convert the file format and utilize the DataUri expression A variable is created that has the converted version of the file via the Initialize Variable flow. The DataUri expression is selected as the value and the file content of the image is added within the parenthesis of the expression. The flow is run. 14:35 Edit the flow and convert the HTML file to a PDF The OneDrive Convert a file using path action and the OneDrive Create file action are added to the flow in order to convert the HTML file to a PDF file. The flow is run. 17:33 Add the flow to Power Apps An app is created in Power Apps and a button is added to run the flow. The manual trigger is deleted from the flow and the Power Apps connector is added. HTML is updated to include the data from Power Apps. The flow is added to the button in Power Apps. 23:32 Generate a PDF from Power Apps The app is previewed and a PDF is generated directly from Power Apps. Additional learning: Video: Power Apps PDF from table data Do you want to become a Power Apps Rockstar? Check out our different full length training classes at https://training.PowerApps911.com or you can download a working version of the app we built today by subscribing to the Curated Library .
- Create an Expense Report in Power Apps using Repeating Tables
In part 1 of Shane’s video series on repeating tables, you will learn how to build an expense report using SharePoint lists as the data source. This demo lays the groundwork for using cascading menus to display results and adding custom functionality in later videos. In this video you will learn about: Power Apps Forms The NewForm function The Collect and ClearCollect functions The ForAll function Link to the video on YouTube: Power Apps Repeating Tables like InfoPath Part 1 - Enter the data Link to the video for Curated Library subscribers: Part 1 - Create the repeating table Key timestamps: 0:00 Intro 2:19 Demo of the solution Shane demonstrates the functionality of his expense report app. The user is able to enter and save expenses by navigating the app with the tab and space bar keys, rather than having to click on each line item. Total expense is automatically calculated. 8:23 Create the solution in Power Apps and insert a form A new app is created in Power Apps and a form is added to display the expense report from SharePoint. 11:32 Put the form in new form mode using the NewForm function and create a new collection using the ClearCollect function The NewForm function is added to the ‘create new expense’ button so that the form is able to be edited. The ClearCollect function is added to the button after the NewForm function in order to create a new collection for every new expense. 13:39 Insert a gallery and use the Patch and Collect functions A gallery is added to display the expense collection. The gallery can be edited and saved through the use of text inputs and icons. The save icon utilizes the Patch, Value, and Collect functions to update the expense collection. 19:33 Add a save button to submit the form to SharePoint using the Patch function The SubmitForm function is added to the ‘save’ button. The ForAll function is added to the OnSuccess for the form. 24:01 Save to SharePoint and demo of the final solution The app is previewed and expenses are saved to SharePoint. Additional learning: Video: Power Apps Repeating Tables like InfoPath Part 2 - View and edit the data Video: Power Apps Repeating Tables like InfoPath Part 3 - Inline editing Do you want to become a Power Apps Rockstar? Check out our different full length training classes at https://training.PowerApps911.com or you can download a working version of the app we built today by subscribing to the Curated Library .
- Recreate the SharePoint LookUp Column functionality in Power Apps
Did you know that you can recreate the SharePoint LookUp Column functionality in Power Apps and avoid all the problems? Learn how to recreate this functionality and do even more with Shane’s demo. In this video you will learn about: The DropDown control The SortByColumns function The LookUp function Link to the video on YouTube: Power Apps SharePoint LookUp Column Link to the video for Curated Library subscribers: Recreate SharePoint LookUp Column like functinality - Relationships Key timestamps: 0:00 Intro 1:06 Open Customize forms in Power Apps directly from SharePoint The Customize forms creates a single screen app with a form. Fields that are not needed are removed from the form. 3:34 Insert a Drop down control in the form and add data from a different SharePoint site collection In the Edit screen, the Department card is unlocked and the field is deleted. A Drop down control is added to the Department card to create LookUp-like functionality. The data source for the Department card is a SharePoint list from a different site collection. Shane troubleshoots two error messages. 8:14 Set the default value and use the SortByColumns function The default value is updated to display different departments. The SortByColumns function is added to alphabetize the data in the Department Drop down control. 10:56 Add a new record to the master list using a dash A new record is added to the master list. The title and manager fields are set to ‘-’ to mimic a blank value. An If function is inserted in the default of the Department Drop down control. 14:53 Open an additional Customize forms in Power Apps directly from SharePoint A label is inserted in the Department card. The LookUp function is added to display a related column. 18:51 Add a button and use the Launch and Lookup functions A button is added outside the form. The Launch and LookUp functions are added to open a record form another list. 21:23 Demo of how to hide the label and button if the form mode is new Shane demonstrates how an If function can be added to either display or hide the label and button depending on the mode of the form. 22:42 Demo of how to switch the custom form back to a default SharePoint form and delete the form Shane demonstrates how to navigate to list settings and form settings to switch the form back to a default SharePoint form or delete the form entirely. Additional learning: Video: Power Apps Lookup Function Do you want to become a Power Apps Rockstar? Check out our different full length training classes at https://training.PowerApps911.com or you can download a working version of the app we built today by subscribing to the Curated Library .
- Use Power Apps to upload a file to a SharePoint document library
With Shane’s super simplified solution, learn how to create a button that uploads a file directly to your SharePoint document library from Power Apps. Includes PDFs, word docs, excel files, images and more. In this video, you will learn about: The Attachment control The Image control The Set function The JSON function base64ToBinary flow formula The EasyUpload.Run action Link to the video on YouTube: Power Apps upload file to SharePoint document library Link to the video and the app download for Curated Library subscribers: Upload a file to SharePoint Document Library Key Timestamps: 0:00 Intro 1:54 Demo of the solution Shane demonstrates the functionality of his ‘Upload a file to a SharePoint Document Library’ app. The button displays all files, rather than a select group of files. 3:51 Create the solution in Power Apps and add the Attachment and Image controls An Attachment control is added to the app and gives users the ability to access all files. An Image control is added to the app and the Last function is used to display the image that has been selected by the user. 6:20 Add a button to the app and utilize the Set and JSON functions A button is added to the app. The Set and JSON functions are added to the button in order to upload a file directly to a SharePoint document library. 9:16 Perform text manipulation to isolate the base64 The Mid, Find, and Len functions are added to the button to isolate the base64. 13:53 Write a flow to get the base64 into SharePoint A base64ToBinary expression is written to reencode the strings. 18:05 Perform additional text manipulation The EasyUpload.Run action is added to the button. 20:07 Demo of the final solution Shane demonstrates the functionality of the final solution by uploading a PDF from the app to the SharePoint document library. He then verifies that the varFileLink has a valid URL. 21:25 Simplify the appearance of the app The code is rearranged and the only remaining visible item on the app is the Attachment control. Additional learning: Video: Power Apps Flow Intro Upload an image to SharePoint using Flow Video: Power Apps upload a file to SharePoint and set the metadata Do you want to become a Power Apps Rockstar? Check out our different full length training classes at https://training.PowerApps911.com or you can download a working version of the app we built today by subscribing to the Curated Library .
- Send an email from Power Apps via the Office 365 Outlook connector
A full demo of all of the different capabilities when sending an email directly from Power Apps using the Office 365 Outlook connector. This video includes everything from formatting to sending complex emails with attachments. In this video you will learn about: The Office 365 Outlook connector and the SendEmailV2 action Setting To, From, Cc, Bcc, Importance, and more Sending a deep link Sending a dynamic table Sending a signature, image, and logo Link to the video on YouTube: PowerApps Send email - Everything you need to know about sending mail via Outlook and Power Apps Link to the video and the app download for Curated Library subscribers: 8/1/2020 - Power Apps Send Email with the Outlook Connector - EVERYTHING Key timestamps: 0:00 Intro 1:27 Demo of the solution Shane demonstrates the functionality of his app that sends emails with a number of different components. 3:13 Create the solution in Power Apps and add the Office 365 Outlook connector A new screen is created in Power Apps. A button is inserted on the screen and the Microsoft 365 Outlook connector is added to the button. 7:07 Set the To, Subject, and Body Shane demonstrates how to send an email to two people. The subject line can include variables, data lookups, and more. The body of the email can include HTML. 9:03 Set the Bcc, Cc, Importance, and From Shane demonstrates how to set the Bcc, Cc, Importance, and From. The importance defaults to low, and can be changed to normal or high. In order to send an email on behalf of a different email, the user must have the permissions to do so. 12:05 Walkthrough of the buttons in the solution The ‘Send email based on inputs + attachments’ button uses the Concat function. The attachments is an Attachment Control copied from a SharePoint list and allows users to attach a file to an email. 20:28 Walkthrough of the ‘Send a deep link’ button The ‘Send a deep link’ button sends a link that directly opens an app in Power Apps. 22:14 Walkthrough of the ‘Send a dynamic table and signature with image’ button The body of the ‘Send a dynamic table and signature with image’ button is a hard coded link to HTML in an HTML control. The user that clicks this button will have their signature and image, or company logo, included in the email. Additional Learning: Video: PowerApps Email Attachments with the office 365 connector and attachment control Video: Create nested data tables with the PowerApps Concat Function Do you want to become a Power Apps Rockstar? Check out our different full length training classes at https://training.PowerApps911.com or you can download a working version of the app we built today by subscribing to the Curated Library .
- Add Data Connections to Other Sources in an Existing Power App
Learn how to connect your existing Power App to a SharePoint list and an Excel workbook. By the end of this video your app will utilize Drop down controls with multiple data sources. In this video you will learn about: Adding Drop down controls with different data sources Link to the video on YouTube: PowerApps Multiple Data Sources Link to the video for Curated Library subscribers: Power Apps Multiple Data Sources Key timestamps: 0:00 Intro 1:06 Demo of the solution and remove the Drop down controls and data sources Shane demonstrates the functionality of his employees app. The app includes two Drop down controls. He then removes both Drop down controls and the corresponding data sources 4:05 Add the data sources back to the app An Excel workbook and a Sharepont list are added as data sources. 6:36 Add a Drop down control to the Department card and set the default value In the Edit screen, the Department card is unlocked and the field is deleted. A Drop down control is then added to the Department card. The data source for the Department card is an Excel workbook. Shane troubleshoots two error messages. An If function is inserted in the default of the Department Drop down control. 12:56 Add a Drop down control to the Favorite Color card and set the default value In the Edit screen, the Favorite Color card is unlocked and the field is deleted. A Drop down control is then added to the Favorite Color card. The data source for the Favorite Color card is a SharePoint list. An If function is inserted in the default of the Favorite Color Drop down control. Shane troubleshoots two error messages. 18:52 Demo of the final solution Shane demonstrates the functionality of his employees app with the two Drop down controls that were just created. Additional learning: Video: Learn to connect: PowerApps Excel Spreadsheet hosted in OneDrive Do you want to become a Power Apps Rockstar? Check out our different full length training classes at https://training.PowerApps911.com or you can download a working version of the app we built today by subscribing to the Curated Library .