Search Content
186 results found with an empty search
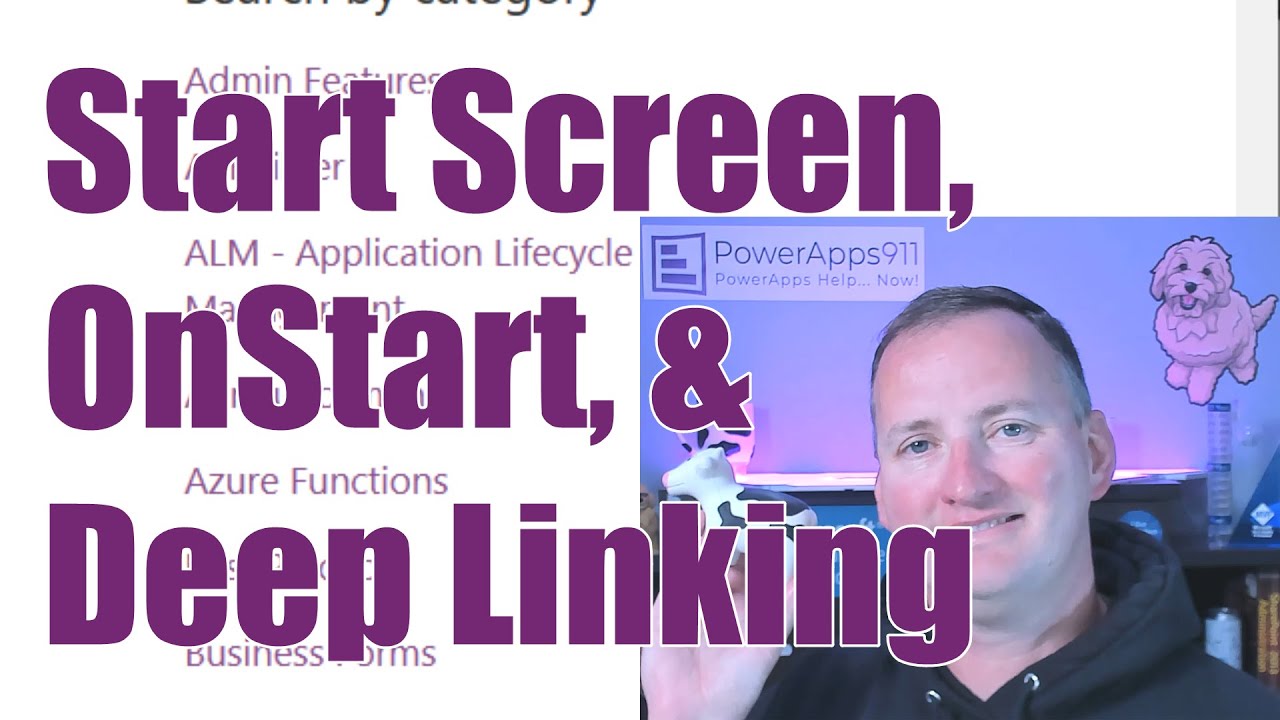
- Power Apps StartScreen, OnStart, and Deep Linking Fix
Explore App.StartScreen, App.OnStart and Deep Linking - all in Power Apps. You will be able to ditch the Navigate property and see how new features work. Shane explains the Start Screen he created and how you can customize your app to add a welcome/intro screen. In this video you will learn about: Setting the start screen in Power Apps How StartScreen may be affecting your apps App.OnStart feature The retired feature you may need to enable Deep Linking Link to the video on Shane's YouTube channel: Power Apps StartScreen, OnStart, and Deep Linking Fix Link to the YouTube Resource Library Subscribers click here to view the video within the library Key Timestamps: 0:00 Intro 0:35 What you're going to learn Shane explains what App.StartScreen, App.OnStart, and Deep Linking are and what will be taught regarding those topics. 1:32 Demo of Start Screen Shane shows and explains his current Start Screen in Power Apps. 2:10 How does Power Apps know what screen to show first Learn how Tree View affects the order of the screens in Power Apps. 3:00 App.StartScreen property Use this property to redirect what screen is shown. Save your app and ensure correct changes in order to display the desired screen. 5:00 Changes with App.OnStart - Navigate Shane shows an old way of making the past changes - using Navigate - and how to do those same actions and more with new features. Navigate is now not permitted in OnStart, therefore the StartScreen property should be used instead. 6:02 How 'IF' logic is supported on StartScreen 8:00 What is "imperative" and "declarative" logic 10:15 Deep Linking- another way to use Start Screen Shane shows the 'Param' function and how to use it to look for certain screens. 14:00 Demo of Shane's "Deep Linking Demo App" 15:50 Using past methods in your new apps Enable Retired Features in your new app when receiving error messages when attempting to perform previously used methods. 17:30 Where is the evolution of Power Apps heading? Blog post explains new features. Upcoming new features soon to be added to Power Apps. Additional Learning: Do you want to become a Power Apps Rockstar? Check out our different full length training classes at https://training.PowerApps911.com By subscribing to YouTube Video Resource Library you can access downloadable apps that are used in Shane's demos.
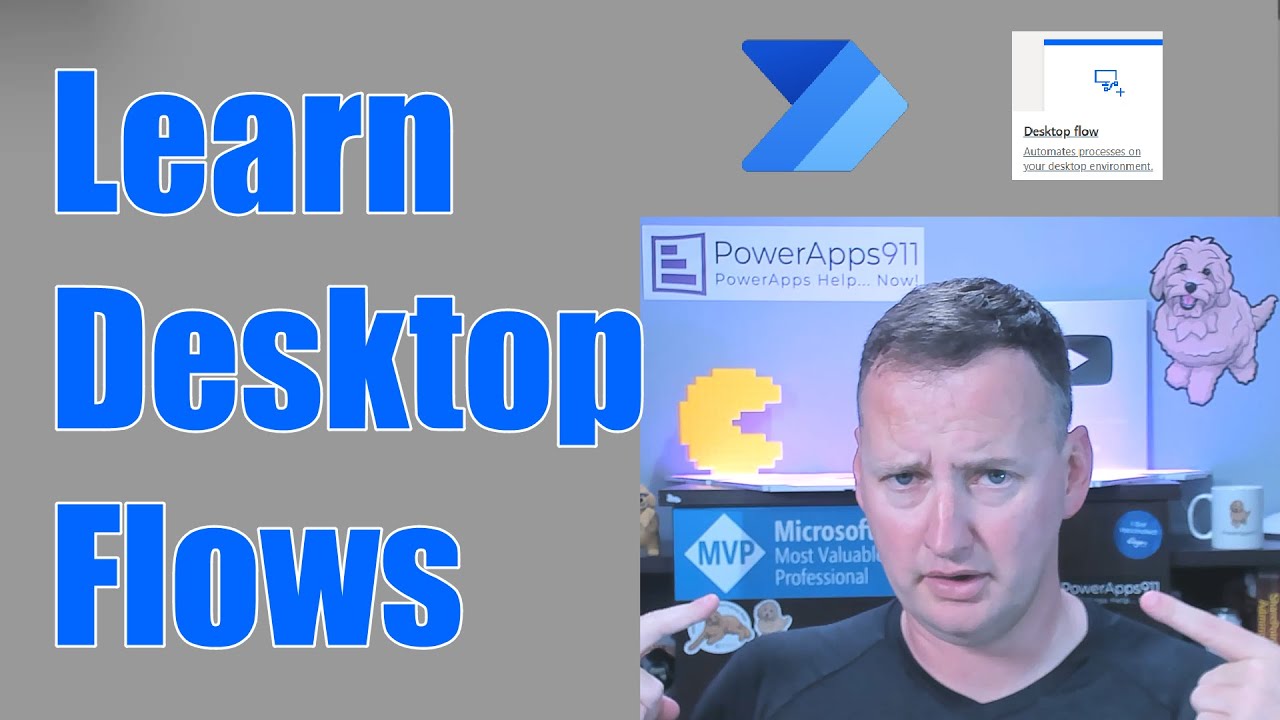
- Power Automate desktop tutorial for beginners
Get started with an introduction to Power Automate Desktop Flows. Shane explains exactly what it is, how to install it, and how to solve a few automation challenges. Follow along with Shane through this video as you build your first Desktop Flow. Included in this video: What are Power Automate Desktop flows and how to install Building your first flow Browser Automations Outlook and Excel Actions Link to Shane's YouTube channel: https://www.youtube.com/channel/UC7_OGRP8BYvtGB8eZdPG6Ng Link to this video on YouTube: https://youtu.be/suk4eLS4A-E Key Timestamps: 0:00 Intro 1:17 Getting started by installing Power Automate Desktop Flow Shane demonstrates how to install Power Automate Desktop Flow, what extensions you can download, and explains any problems you may come across. 2:33 Start building the Desktop Flow Learn how to begin navigating through Power Automate once you have it downloaded. Shane explains how the flow he will build is going to perform in Power Automate. 4:51 Browser Automation and our first variable Shane begins with opening a new browser window and extracts data from a web page. Learn how to then store your data within a variable, while also understanding any possible errors. 9:34 Outlook Actions to send email messages through Outlook + Flow control Wait Learn how to send a new Outlook email message within Power Automate. Shane explains how to make Power Automate delay closing Outlook to ensure the message is sent, and Outlook is not closed too quickly. 13:29 Excel Actions + Date time action Open an existing file in Excel and create a variable. Use an action to retrieve the first free column/row on the active worksheet. Shane explains how to write the current date and time to your Excel worksheet. 19:35 Running the Desktop Flow you built You did it! You have completed your first Power Automate Desktop Flow. Run it and see your hard work in action. Additional Learning: Video: Power Automate Desktop Web Recorder, Conditional, and Go To action Video: Create SharePoint List using Power Apps and Power Automate Do you want to become a Power Apps Rockstar? Check out our different full length training classes at https://training.PowerApps911.com or you can access downloadable apps used in Shane's videos through our YouTube Video Resource Library .
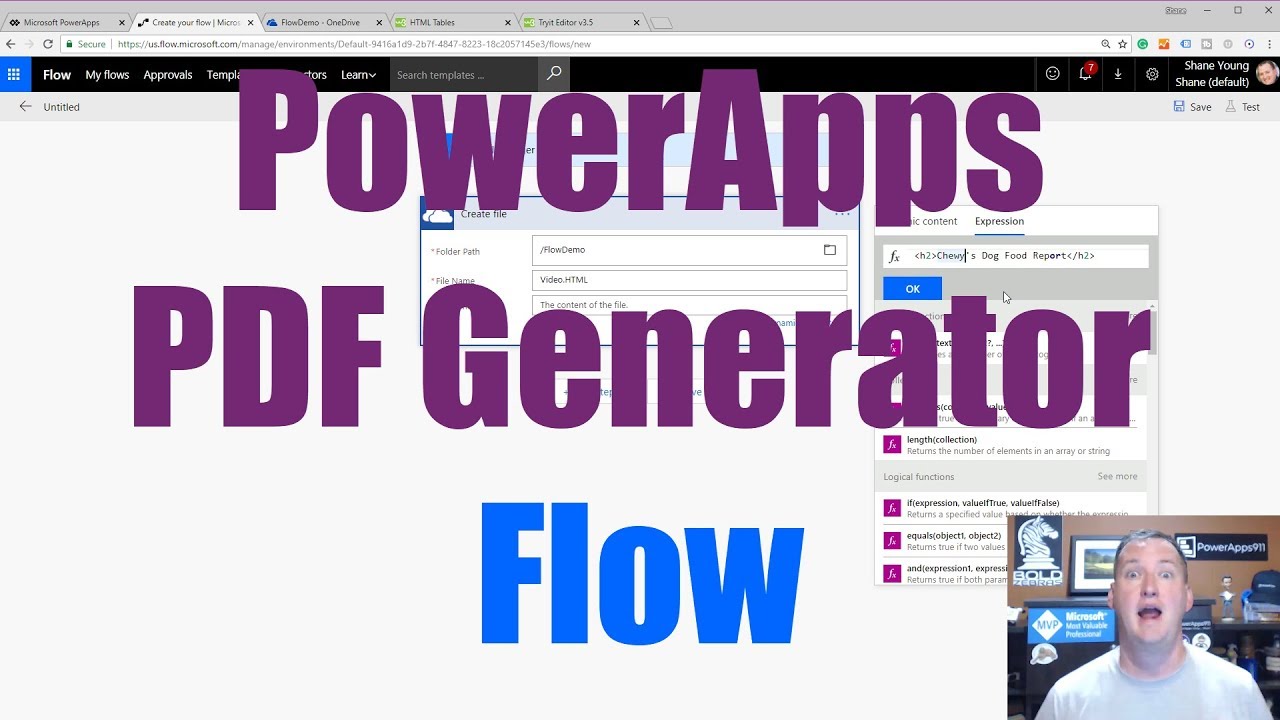
- Printing in Power Apps Video Series
In this video series you will learn about different methods for generating PDFs and printing with Power Apps. The following 5 videos are included in this series: Power Apps PDF generator - https://www.youtube.com/watch?v=2rfAQe1kK8M Dynamic PDF generator - https://www.youtube.com/watch?v=bfXV_GXc_JM Convert Images for PDFs & Components - https://www.youtube.com/watch?v=bIne3DD3HAg&t=2s Power Apps Print API - https://www.youtube.com/watch?v=m4Fu9af2h1c&t=205s Print with Power Apps - https://www.youtube.com/watch?v=JMhVtII5hQs&t=3s Printing in Power Apps: Power Apps PDF generator Do you need to make invoices or keep record of something in Power Apps? Learn how to do this and more by using the Microsoft Flow PDF Converter to create a PDF generator in Power Apps. In Shane’s Power Apps PDF Generator using Microsoft Flow PDF Converter video, he demonstrates how to make HTML, utilize Flow and OneDrive, and finally send information from Power Apps directly to a PDF. The goal with this video is to automate data collection in order to get rid of paper, store the data in an accessible location, and subsequently present that data in an efficient way. Key timestamps: 0:00 Intro 2:04 Demo of the solution 3:08 Write the HTML, add it to Flow, and utilize the Concat function 9:21 Convert the file format and utilize the DataUri expression 14:35 Edit the flow and convert the HTML file to a PDF 17:33 Add the flow to Power Apps 23:32 Generate a PDF from Power Apps Dynamic PDF generator This video takes the PDF generator a few steps further and will teach you how to build a more complex PDF with dynamic data and an HTML table. Shane's Power Apps PDF from table data video builds upon the concepts shown in his Power Apps PDF Generator using Microsoft Flow PDF Converter video above. By filtering a data source, multiple rows and columns will be returned that can then be saved as a PDF from Flow. Key Timestamps: 0:00 Intro 1:37 Demo of the solution 4:10 Overview of the solution 9:50 Overview of the Flow 11:37 Utilize the Concat function 15:13 Create an HTML table 20:38 Format the HTML table 25:24 Generate a PDF from Power Apps Convert Images for PDFs & Components Image files can be tricky to work with throughout your Power Apps. One way to navigate this is to convert image files and use them in their encoded form. In Shane’s Power Apps Convert Image to Base64 for Emails, PDFs and Components video, he demonstrates how to convert an image to base64 for emails, pdfs, and components. Key Timestamps: 0:00 Intro 1:47 Insert an image and resize it using the Snagit Editor 4:24 Convert the image to Base64 5:45 Add the Base64 to the image control 6:47 Send the image in an email 10:02 Overview of including the image in a PDF 12:06 Update the image in the component library Power Apps Print API One approach to printing labels, barcodes, forms, and more directly from Power Apps is to utilize a 3rd party API called PrintNode. PrintNode allows users to connect their printer, generate an API key, and then use that API key over in Flow. In Shane’s Power Apps Print directly to a printer with an API – PDFs, Labels, Barcodes, and more with Flow video, he demonstrates how setup PrintNode and build a Flow in order to print directly from Power Apps. Something to keep in mind here is that the Flow is premium, and Shane will further discuss licensing later in the video. Key Timestamps: 0:00 Intro 2:15 Demo of the solution 5:44 Overview of the Flow 8:12 Overview of PrintNode 10:42 Build the flow 19:38 Overview of licensing Print with Power Apps The new Print() functionality in Power Apps allows you to save a screen as a PDF or print it directly to a printer. Printing can be done by simply inserting an icon and adding the Print function. In Shane’s Power Apps Print function and adding it to your forms and apps video , he demonstrates how to add the Print function to an existing form and app. Also covered in this video are some of the nuances of the functionality. For example, Shane compares the Print function to taking a screenshot. If you are trying to print screen that includes a gallery or a form, only what is displayed on the screen will be printed rather than the entire gallery or form. In addition, the Print function is does not currently work on a mobile device. Key Timestamps: 0:00 Intro 1:23 Demo of the solution 3:12 Print an existing app with the Print function 5:00 Nuances of the Print function 5:26 Hide the print icon from the screen when printing it in the Visible property 8:45 Print a single record to look like data 12:12 Send the user back to where they came from after printing in the OnSelect property 14:44 Remove the screen fill from the screen when printing in the Fill property
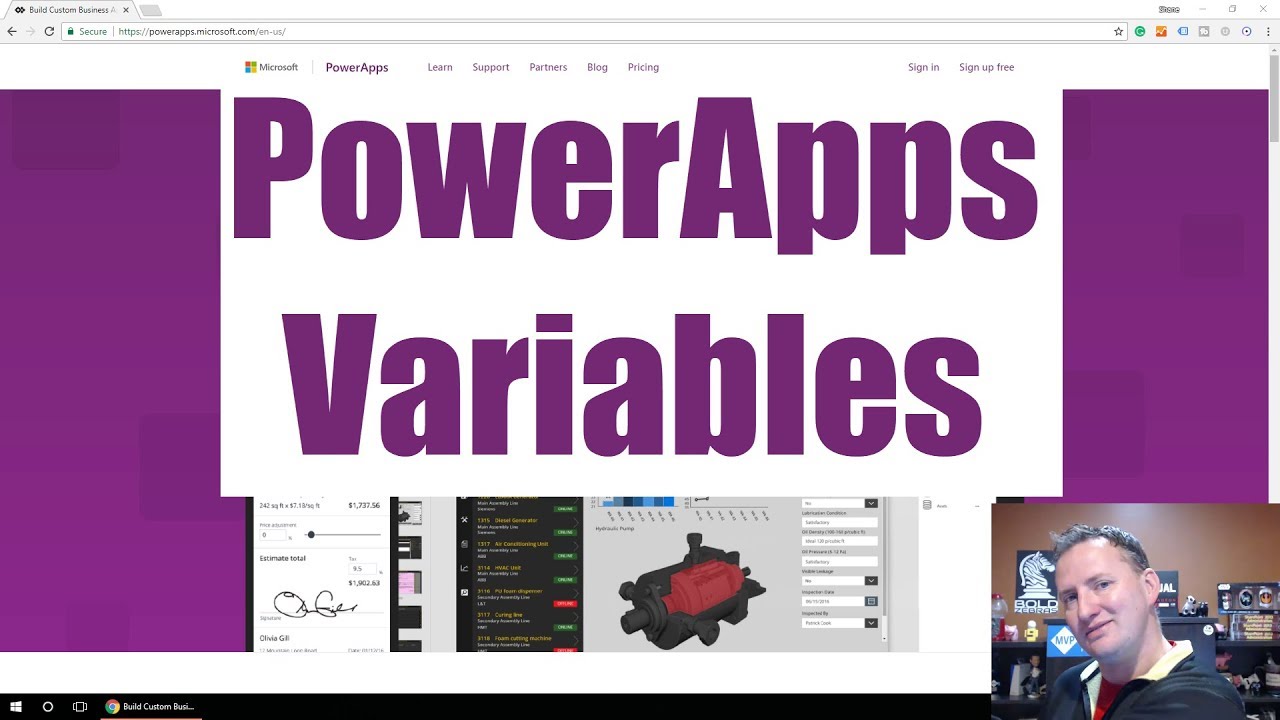
- Introduction to Power Apps Variables
In this video you will learn how and when to use contextual and global variables within your Power Apps. In this video you will learn about: Contextual variables Global variables Link to the video on YouTube: Intro to Power Apps Variables Link to the video and the app download for Curated Library subscribers: Key timestamps: 0:00 Intro 0:51 Create the solution in Power Apps and demo of Excel-like functionality Shane starts by creating a blank tablet layout app in Power Apps. An Excel spreadsheet is recreated in the app by inserting two text inputs and two labels. variables not used 5:15 Demo of a Contextual variable A contextual variable stores a value and makes it available on one screen. A button is inserted and the Update context function is added to the button. 9:49 Demo of pushing a Contextual variable to another screen A button is inserted and the Navigate function is added to the button. 13:44 Demo of a Global variable A global variable only needs to be created once and then can be used throughout an entire app. A button is inserted and the Set function is added to the button. Additional learning: Video: Working with a Power Apps Collection Do you want to become a Power Apps Rockstar? Check out our different full length training classes at https://training.PowerApps911.com or you can download a working version of the app we built today by subscribing to the Curated Library .
- Build your first Custom App in Microsoft Teams with Power Apps and Dataverse
Learn everything you need to know about building your first custom app in Microsoft Teams by using Power Apps and Dataverse. Start by creating a table, adding columns, and then customize the app to your liking. In this video you will learn about: Creating an app in Microsoft Teams Creating a table in the app and different column types The Color and Font size property The User function Table, Gallery, and Form customizations Link to the video on YouTube: Build and Customize your first Teams App with Power Apps Full Training Link to the video and the app download for Curated Library subscribers: 9/22/2020 - Build and Customize your first Teams App with Power Apps Full Training Key Timestamps: 0:00 Intro 1:26 Demo of the solution Shane demonstrates the functionality of his employee dataset app in Microsoft Teams. The app includes a gallery of employees and each is able to be edited by the user. 3:10 Create the solution in Power Apps within Microsoft Teams and add a table in the app Find and select the Power Apps Preview app in order to create an app directly in Microsoft Teams. Create a table and add columns for job title, first name, last name, age, hourly wage, hire date and good at their job? The columns utilize numerous different types such as text, number, decimal, date, yes/no and choice. 10:21 Preview the solution and perform additional editing to the data Shane demonstrates an alternative way to view and add columns to the table. Add an image column called ‘face’ to be able to display employee pictures. General navigation and how to move back and forth between Teams and the app. 17:28 Customize the app Use BrowseGallery to change the order of the fields. Show first and last name in the label control. Change the age label to display hourly wage, and format as currency. 22:06 Overview of Power Apps Formula Reference 24:58 Use the Color property and Font size property Shane demonstrates different ways to show colored text with the color property, the RGBA function, and the ColorValue function. 29:37 Add the Face field to the form Face field is added to the app. Employee pictures are now able to be added to the form and to the gallery. Change the properties on the face card to display the picture as high resolution. Change the number of columns and customize the layout. 35:21 Use the User function Displays ‘Hi (employee name)’ depending on what user is viewing the app. 37:02 Publish to Teams Add the app to a channel and view the app in the channel that it was saved to. Changes that are made to the app are not visible to users until the app has been published. Additional Learning: Video: Create your first custom app for Microsoft Teams with Power Apps in 5 minutes - Dataverse for Teams Article: Power Apps Formula Reference Do you want to become a Power Apps Rockstar? Check out our different full length training classes at https://training.PowerApps911.com or you can download a working version of the app we built today by subscribing to the Curated Library .
- Save Data in Power Apps with Patch, Collect, and ForAll functions
Do you need to build forms and collect data from your users? Learn the best ways to save data back to the data source when building and working with controls in your apps by using the Patch, Collect, and ForAll functions. In this video you will learn about: The Patch function The Collect function The DropColumns function The ForAll function Link to the video on YouTube: Power Apps Save Data - Patch, Collect, and ForAll Link to the video for Curated Library subscribers: Power Apps Save Data - Patch, Collect, and ForAll Key timestamps: 0:00 Intro 1:45 Demo of the solution Shane demonstrates the functionality of his ‘Spooky Halloween Candy Tracker’ app. The data that is recorded for each house is sent straight to SharePoint. The app allows users to record data for both individual houses and groups of houses. 7:22 Walkthrough of the cat scratch image and sound effect The cat scratch image and corresponding sound effect are triggered when the user presses the ‘Enter if you dare!!!’ button. The UpdateContext, Clear and Navigate functions are utilized along with an audio control. 9:01 Brief overview of the Text input, Drop down, Slider and Rating controls The second Drop down control utilizes the If function and a Cascading Drop Down in order to display different options depending on what was chosen in the first Drop down control. 10:09 Walkthrough of the Patch function The ‘Record House’ button utilizes the Patch and Defaults functions to send the data to SharePoint. 14:41 Walkthrough of the Collect function The ‘Record House’ button on the Collection Style screen utilizes the Collect function to send multiple sets of data to SharePoint. The DropColumns function is utilized to drop the Bonus column because it has bad data. 21:20 Walkthrough of the ForAll function The ‘Save - Hard Way’ button on the View Collection screen utilizes the ForAll, Patch, and Defaults functions. Additional learning: Video: Power Apps AddColumns ShowColumns Video: Power Apps Patch Function Video: Working with a Power Apps Collection Do you want to become a Power Apps Rockstar? Check out our different full length training classes at https://training.PowerApps911.com or you can download a working version of the app we built today by subscribing to the Curated Library .
- Custom SharePoint List Form with PowerApps
In this post, you will learn how to build a custom SharePoint List Form with PowerApps. Here, we will focus on the basics and get you through a few challenges along the way. As we dive in, some of the topics we cover include: SharePoint Integration connector, modifying the form, adding a button, and how to delete the form. Let’s get started! Create Your Form First of all, you will need to create a SharePoint list using the modern SharePoint experience. If you don't use the modern SharePoint experience to create your list, you're not going to have the same options we'll work with and discuss within this post. If you have used the modern SharePoint experience, you’ll see “PowerApps” on the top bar. For this example, we have created a list that includes: CEO Driver PowerApps Guru Dog To start, click on the first item, “CEO.” Once you do this, you’ll see that the default SharePoint List Experience opens, which you can then edit. At the top, you have the option to “Customize.” If you click on “Customize,” PowerApps will launch after about 20-30 seconds. Now, you can see that PowerApps and SharePoint work together to create a list form. Here you can see various fields. Some fields are editable, and others are not. And, just like that, you can create a fully functional form. Now you need to click on one of the Data Cards. Whatever property shows up in the fx column, hit space, and then go back and delete it. Basically, you’ve made a change and deleted it. Then go to “File” and “Save.” And, in a few seconds, that will save your app. Next, click “Publish to SharePoint”. Trick: If you do use the link SharePoint gives you, you have to wait for PowerApps to load and unload all the time. Instead, take advantage of the link they provide you in the “Save Menu” you’ve just used and right-click on it and hit: “Open Link in New Tab.” This way, you have one environment working on PowerApps and one with SharePoint. This will cut down on the back and forth between pages–which can be finicky. So, now you can work between the two tabs more easily. Now go back to your SharePoint list and click on “CEO.” You will see a new list. If you click on “Edit All”, you can see your PowerApps app and which fields are editable and not edible. Here, you can “Save,” “Cancel,” and “Copy Link,” etc. Now you have a custom form. (If you are new to PowerApps and SharePoint, there is a YouTube tutorial that you may want to watch first and come back to this post. You can find the link to the video here .) Modifying Your Form Next, switch back to your PowerApps tab, and you’ll see from a PowerApps point of view the automatic process created a “Form Screen 1” on the left-hand side. Underneath this, you’ll see they have only put one SharePoint Form. Take note that this is a little different from the default Sharepoint App that has 3 screens. (One for viewing, one for editing and new, and one for finding the item in the list.) Here they have all these in one screen instead. Understandably, this will take a little getting used to. But, they have based this form on how you have got here. So, how you got here is going to determine what ‘form mode’ the form is in. The way you can figure this out is that if you click on “SharePoint Integration” on the top left-hand side, and then click on the “Data Source” dropdown. This is where you control the form. If you click on “View”, it opens up the form and puts the form mode in View. And “Edit” puts the form mode in Edit. This is important for two reasons: It figures out what mode to be in. Showing you and giving you the proper experience you want. This is helpful as you explore more in-depth custom solutions down the line. Next, we’ll look at editing the actual forms. When you have the edit experience, you’ll see that you have several fields that you can’t edit. So, let’s try and get rid of these. So, go back to your SharePoint list and click on the “Modified Data Card”. Then click on the “Data Source” dropdown menu and go to “Visible.” Right now, you will see that it’s set to “True” in the fx formula. To change this, instead of “True”, enter “ sharepointform1.mode=Formmode.View, true, false ”. This simple formula will help clean up your editing experience and hide the things you can’t edit. However, you don’t want to deal with this formula all the time. And, we know that you can’t group Data Cards together. But here is what you can do: Editor Form Screen (you were just on Modified) Now, you go back to your Data Source dropdown menu. Select the ‘Visible’ property and change the property to: “Modified_DataCard1.Visible.” ‘ ID’ is another one you may want to hide, so paste: “Modified_DataCard1.Visible.” again to hide it. You can then do it for ‘Author’ too. Paste: “Modified_DataCard1.Visible.” The last one is ‘Created’, so change this to: “Modified_DataCard1.Visible.” So now, when the form is in ‘New’ and ‘Edit’ mode you are not going to have to worry about this. Now, “Save”, and Hit “Publish To SharePoint.” If you hit “Refresh”, and hit “Edit”, you’ll see the properties are still here. Remember, you will need to refresh again. Now you’ll see the changes that have been made. Be sure to hit refresh often, as this will help eliminate any hiccups. Take note: One of the downsides of hiding these fields is that it can lead to trouble down the line. You might forget you’ve hidden them, or maybe someone else needs to edit your app. To prevent this, you will need to create documentation. Go to “Form Screen 1”, click on “Home Screen” Click on “Screen 1,” then “New Screen” and you’ll see it pop up at the bottom. Call this “Documentation.” Next, insert a label and make it bigger, and place some text in here, such as this, "Modified_DataCard1.Visible hides the non-edible properties." You can now create documentation for your own benefit, and there is no way app users can access it. Create a Button Now, let's customize this app a bit more by adding a button. To start, grab the form box border and pull it up. So now you have a blank space to do something with. Let’s make a button that emails a link to users here. First, you are going to add a text input on the form. Click “Text” then “Input.” Now drag the text box down. Next, get rid of the default text in the fx formula. Click on “HintText” and then “Enter an email address” Then rename “TextInput 1” to “EmailTo” for example. Then hit “Button” on the top. Next, add “Data Source” to the button. A pop-up menu will appear on your right. Next, click on “+ add data source.” As an example, here you can choose the Outlook option. (If you need a tutorial on how to create emails, watch this video .) Now that you’ve added this, select the button and in the fx formula delete the default text and add: “Office365.SendEmail (EmailTo.Text, Check out this item, “SharePointIntergration. Selected”. You’ll now see all the properties for the current item you are working with. Then choose the “Link Property” option. Finally, you can change the text on the actual button and call it, “Email Link.” Now, go to “File,” “Save”, and hit “Publish in Sharepoint.” Now, go back to your PowerApps and hit refresh to save yourself from any frustrations. Click on “CEO.” The pop-up menu will now show your new button and you can test it. Place your email address in the box above the button. Hit the button below “Email a Link,” and you should see an email in your inbox. There will be a link within the body of the email that will open the item in your browser. What happens if you don’t like the form? Maybe you want to delete the form or start over? To do this, go to “List Settings.” Under “List Settings” you’ll see “Form Settings.” Here you will see three choices that you can select: 1. Use a custom form created by PowerApps: You will only use this option if you want to use SharePoint’s out of the box form. 2. Use the default Sharepoint form: If you want to get rid of your form altogether, use this option. That will switch it back to the SharePoint out of the box form. Now you’ll see “Delete Custom Form” appear below this option. That will delete it completely. 3. Use a Custom Form outlined in InfoPath: We won’t go into this option in this post. A Few More Things to Consider: Anyone using this SharePoint List needs to have a PowerApps license to use your PowerApps form. If someone else logs in, they will need to allow all the data connections. For example, because you added the email link, the new person logging in will need to agree to these. So, there you go. Now you know how to customize a SharePoint List Form with PowerApps. While we have used some basic examples, we hope that this forms a good foundation that will help you to customize your SharePoint list even more. And open up your minds to a variety of creative solutions. Build Your Own App with PowerApps Today Power Apps provides a rapid application development environment to build custom apps for both your personal or business needs. Apps built using PowerApps have a responsive design and can run seamlessly on your browser, and mobile or tablet devices. Whether you need assistance with an issue or complete project services, PowerApps is here to help. To watch the full video tutorial on how to Customize a SharePoint List Form with PowerApps, click here.
- Sharing Power Apps with External Users
Learn how to share your Power Apps Canvas App with users who are outside of your company. If you need to share your Power Apps canvas apps with vendors, partners, customers, clients, or anyone outside your organization now you can thanks to Azure B2B sharing. In this video, you will learn about: sharing with Gmail accounts sharing with Office365 accounts using SharePoint external sharing and Office365 Manage Users to share apps troubleshooting Link to the video on Shane's video on YouTube: https://youtu.be/suk4eLS4A-E Key Timestamps: 00:00 It starts 2:06 Demo of the app Shane demonstrates his app and begins beginning steps on how to share with external users that have an Office 365 account. 3:07 Start sharing with an external Office 365 user via SharePoint Share Shane explains how to share the data source and app to the desired user. See what this looks like for the external user that you are sharing with. 8:55 Troubleshooting data source access issues Shane explains how to resolve a few issues you may come across when the external user is trying to see your app. 11:43 Inviting an external user in Azure AD from their Gmail account using the admin portal Shane uses recently created test email to help explain inviting external Gmail accounts. In the Azure AD portal, invite a guest user through their email. Understand the steps the user will have to take to access this app. 15:14 Creating a Microsoft Account with your Gmail address Your user must connect their Gmail to a Microsoft Account in order to view the app you shared. 19:10 Fix the "You don't have permission to view this data" error messages by sharing lists Ensure the guest user will be able to see what you have shared. 21:00 Brief overview of licensing external users Shane explains you must provide a license to users who do not have one from their organization. 21:52 Authentication vs. authorization aka who deals with passwords If you are facing any challenges, PowerApps911 can help you! We have mentoring services where we can talk you through fixing your problems. Or maybe you don't have the availability to work on this on your own... no worries! We offer full project services where we can do the entire build for you. Additional Learning: Power Apps Images to Email and PDF - YouTube Do you want to become a Power Apps Rockstar? Check out our different full length training classes at https://training.PowerApps911.com or you can download a working version of the app we built today by subscribing to the Curated Library .
- Power Apps Attachments for SharePoint - Files, Images, and Signatures
Learn with Shane Young how you can use Power Apps and Power Automate to get attachments into SharePoint; no forms necessary! Included in this video: Attach files to SharePoint Attach images from the camera control to SharePoint Attach signatures from the pen input to SharePoint Link to Shane's YouTube Channel: https://www.youtube.com/channel/UC7_OGRP8BYvtGB8eZdPG6Ng Link to this video on Shane's YouTube: https://youtu.be/K74UFYgrKB4 Key Timestamps: 00:00 Intro 2:01 Demo of attaching a file to a SharePoint list item using power automate flow Shane walks through how he attaches a file to a SharePoint list from the app he built. No form controls are used; instead, independent pieces are used, then passed through a flow. 5:18 Demo of attaching a signature from the pen input control to a SharePoint list using power automate flow Shane uses pen input control and uploads it to his SharePoint list. 5:43 Demo of attaching a picture from the camera control to a SharePoint list item using power automate flow Shane demonstrates how to take a photo in camera control, then upload the image to a SharePoint list. 6:41 Begin to build as you follow along with Shane Creating the PowerApps inputs, including choices, for creating the item. 7:56 Get a PowerApps Attachment Control from a form Shane explains how to get an Attachment Control using a form. Save time on this build. Instead of trying to copy from this video, subscribe to YouTube Video Resource Library and be able to download all apps Shane uses in his videos. 13:08 Create a flow for uploading attachments to SharePoint Create an Instant Cloud Flow. Create Item and Add attachment actions. 21:44 Attach an Excel file to a SharePoint list item via Power Apps Shane explains how this work with any attachment, such as Excel files. 22:52 Use a Pen input to capture a signature with Power Apps and attach it to SharePoint 24:45 Take a picture with the PowerApps camera control and attach it to the SharePoint item Additional Learning: Power Platform for SharePoint 201 - On Demand Power BI 102 - On Demand All Access Subscription - On Demand
- SharePoint Custom Forms with Power Apps
Shane Young demonstrates how to customize your SharePoint list forms with Power Apps. Learn how to get started, has SharePointIntegration control works, save, publish, and tips to make it easier for you to customize your SharePoint Online lists. Included in this video: getting started SharePointIntegration Control saving and security adding an Outlook and Power BI connector warning tips Link to the video on Shane's YouTube : https://youtu.be/2J9h8dqQlg8 Link to Shane's YouTube Channel: https://www.youtube.com/channel/UC7_OGRP8BYvtGB8eZdPG6Ng Key Timestamps: 00:00 It starts 1:38 Demo of a custom SharePoint form with an Outlook and Power BI Connection 4:13 Customize your first SharePoint form including save and publish Shane shows how to customize your first SharePoint form using PowerApps. Save and publish your form. 8:40 The forms DataSource and Items property 10:24 SharePointIntegration control .Selected record and .SelectedListItemID Shane explains what each of these are and how you use them. 12:00 Save, Publish, and open SharePoint list Do this in a second tab to make going back and forth quicker and easier. 13:18 SharePointIntegration Edit button, New Button, Save Button, Cancel Button, OnEdit, OnNew, OnSave, OnView, OnCancel Follow along on how to change buttons if needed to direct SharePoint to do what you need. 14:27 SharePointForm1 OnSuccess ResetForm(Self) RequestHide() 15:43 Add the Office 365 Outlook Connector Send an email with a button SendEmailV2. 18:19 Resize the display form Learn how to resize your form it doesn't look how you want. 21:06 Saving and security File, Save, Save As, Security Running the form stand alone, and why none of them work for these custom forms 22:36 Add the Power BI Tile 23:01 Manage your form Manage, hide, and delete your custom form from SharePoint List Settings Form Options 24:19 Warnings!!!! Shane shares his warnings on overusing this. Don't do too much! 25:25 Use the SharePoint Webpart Microsoft PowerApps Preview on a Modern Page Additional Learning: Power Platform for SharePoint 201 - On Demand Course Learn how to use Power Apps and Power Automate (Flow) with SharePoint Online. This course teaches you everything you need to know to start customizing today. All Access Subscription - On Demand Courses Gain access to ALL our On Demand content that we have available, along with Office Hours invitations and YouTube Video Resource Library access. Cancel anytime.
- PowerApps set default value based on another field from a dropdown
In this video, Shane Young answers the question of how to set default values based on a dropdown. By following along, you will learn to create a dropdown, and when your user selects a record you will then populate a text input, a different dropdown, a combo box, a collection, and even a people picker. Included in this video: set default values based on a dropdown use a dropdown to set various input values for Patch use a dropdown to set other field values use a dropdown to find a default user in a combo box use a dropdown to populate a collection from another datasource Link to the video on Shane's YouTube: https://youtu.be/1Q8L2H8cpEo Link to Shane's YouTube Channel: https://www.youtube.com/c/ShaneYoungCloud/videos Key Timestamps: 00:00 Start 01:34 Demo Shane shows his app and the problems you can solve with dropdowns. 04:01 Using a dropdown to set default values By using his app, shows how to use a dropdown to set default values of a text input, drop down, and a label. See what errors may show, and how to resolve them. 09:37 Shane goes back to the previous normal form to show more steps Setup a gallery, a form, and unlock some cards. Populate fields based on data from a different table data source. Understand what some common errors mean. 17:19 Questions from viewers - People picker field Look at how to set a combo box from the selection in a dropdown control used for a people picker and Office365Users.SearchUserv2 19:09 Use the chosen record in a Power Apps Dropdown to populate a collection Shane explains how he does this by using the OnChange property. Additional Learning: Power Apps and Power Automate 201 - On Demand Course Take your fragmented Power Apps and Power Automate skills and transform them into solid skills with this course. You know your business process inside and out, let us help you with Power Apps and Power Automate. Power Apps and Power Automate 401 (Advanced) - On Demand Course In this class, you will explore 8 different topics that will have you think at the next level. Each module will use a real-world example to illustrate how to implement the concepts discussed.
- Power Apps Tutorial for Beginners
Learn how to make your first app in Power Apps with Shane Young's updated version of his PowerApps tutorial for Beginners. Follow along as you learn all the options available when creating your first app. Get started building now! In this video: Build your first app from SharePoint data Make customizations to your gallery Save, publish, and share your first app in Power Apps Advice from Shane Young to help you continue your learning journey Link to the video: Power Apps Tutorial for Beginners - Learn to make your first PowerApps Intro Link to Shane's YouTube Channel: Shane Young's Channel Key Timestamps: 0:00 It Starts Begin learning how to make your first app in PowerApps with Microsoft MVP, Shane Young. 0:26 Start at https://make.powerapps.com 1:08 Overview of Power Apps Template apps Shane explains that he recommends using the templates for inspiration, and not editing them. 1:44 Start from the beginning See the different ways you can begin creating your app. Begin with a Blank App or from data like, Dataverse, SharePoint, Excel, or SQL Learn why starting with SharePoint is best when making your first app. 2:32 Quick view at the SharePoint list we are going to use to build the app Shane shows a view of the SharePoint list that will be used in this video, which also has been used in countless previous videos on his channel. 3:13 Create a PowerApp from SharePoint list by connecting to SharePoint Copy the URL of the SharePoint list you are using. Choose 'SharePoint' in the 'Start From' section; by doing this, Power Apps automatically walks you through the process of automatically creating an app from this particular SharePoint list. Beginners will select 'Create a New Connection' on the left side of the desktop. Paste the URL you previously copied, and click Go. 4:20 Give your app a name and save it. A fully functional app is created for you. Click 'File', and give your first app a name. 5:18 Preview the app by using the play button Make sure you save your work to activate Autosave. See your app in action. 5:36 Mobile PowerApps vs. tablet or desktops apps Apps look different depending on the device you are using. The automatic process built a mobile Power Apps app. 6:04 View and edit your SharePoint items with the app Explore the SharePoint items that are now in your app. Learn how to view these items, as well as edit them if needed. 7:08 Create a new SharePoint record by using Power Apps Along with viewing, editing, and deleting; you can also create a new item in your app. 7:45 Editing the app in PowerApps Studio by introducing the Gallery control BrowseGallery is one of the controls in Power Apps. Galleries show you listed data. 8:54 Write your first formula using the Text function to format the number as currency like Excel Transform the current numbers into formatted numbers with the Text function. 9:58 Save and Publish your app Your users will always see your Published version of your app. You can always make changes, but until you publish those changes they will not be seen. 10:32 Share your app with a coworker and overview how PowerApps security works including co-owner and data permissions Share the first app created. Add a co-owner if you would like someone else to be able to use, edit, and share the app. 11:36 Ideas to explore the app more Congratulations! You have built your first app. Your next step would be to explore more of your app and understand options for adjusting items in your app. Learn more with our FREE introduction course. See details below. Additional Learning: Did you enjoy Shane Young's Power Apps Tutorial for Beginners? The fun doesn't stop there! Enroll in our FREE Introduction to Power Apps Course. - Power Platform 101 Do you have the hang of it and want to advance your skills even more? Check out the Live and On Demand Power Platform Training options that we have available! - PowerApps911 Training