Search Content
186 results found with an empty search
- Send meeting Notes and Invites using Power Apps and Power Automate
Every week as part of Power Platform University I have to do follow-up after our live sessions. I send notes on what we covered, links to recordings, and information about the next meeting. To create a better student experience, I wanted to also include an Outlook Calendar Invite with a link to the Teams meeting. This way there would be no confusion or reasons to miss. The challenge is each student needs their own invite. So not 1 invite with 50 people but 50 invites with 1 person. 🤯 Power Apps app for Input So I decided to use Power Apps and Power Automate to solve my challenge. Power Apps for me to provide all of the inputs like date and time, mentor recipients, and then the HTML body for the invites. Easy peazy for Power Apps Canvas Apps. Two challenges with the App. 1 - Saving the previous week's Message to SharePoint so each week I pick up where I left off. 2 - Setting the DefaultSelectedItems for the Combobox of mentors. I ended up making up a new technique for this. Both challenges and how to overcome them are detailed in the video. Power Automate cloud flow the work The Power Automate cloud flow was a bit trickier. The list of University students is only available via an API to ThinkIfIc, the 3rd party provider of our training platform. So the first thing the flow has to do is get the current students from the API. Then we use Parse JSON action to turn the JSON into dynamic content we can use in the flow. In this section we also talked about inputs that could be Null and how to avoid them crashing your flow. Now because the Table of students includes internal and external people, I wanted to filter out the PowerApps911 email addresses. I did this with a Filter Array action. Now we have the table of the people we want to send to we use Apply to each action to loop through the results. This allows us to create one invite per student and send it to them. Here you can see we used the inputs passed in from Power Apps and a hard coded Teams online meeting link. Perfect. Finally, we send an email with the meeting details to the internal mentors just so they know the invites went out. Boom! This App and Flow saves me about an hour a week of work and makes for a better experience for the students. If you want the gritty details of how we built the flow and app then check out this video. Meeting Follow Ups and Invites with Power Apps and Automate
- Model-driven vs. Canvas Power Apps
Are you looking to take your app development skills to the next level? Do you want to explore the pros and cons of Model-driven and Canvas apps and learn how to build apps using both technologies? Then look no further than our 10-part series on Power Apps! Our Model-driven and Canvas app development experts walk you through building the same app in each technology, providing in-depth guidance and tips along the way. Whether you're a beginner or an experienced app developer, this series provides valuable insights into the differences between Model-driven and Canvas apps and can help you make informed decisions about which one to use. Here's a breakdown of the topics covered in each episode: Episode 1: Overview and Creating the Solution In the first episode of our series, our experts provide an overview of the series and demonstrate how to create the solution for the app using Dataverse as the data source. Watch the episode here: https://youtu.be/SKSfgyWP2jc Episode 2: Creating the Dataverse Tables In the second episode, our experts show you how to create two Dataverse tables with relationships for the app using a simple design. Watch the episode here: https://youtu.be/7jsNlcFtCo4 Episode 3: Making a Model-driven App Our third episode demonstrates how to customize Dataverse forms and views and create a model-driven app from the tables created in episode 2. Watch the episode here: https://youtu.be/_BPOMjB3f8s Episode 4: Build a Canvas App with Canva and Container In this episode, our experts switch gears and create a canvas app from scratch, starting with a blank tablet app and using Canva designs to create the home screen. Watch the episode here: https://youtu.be/Xe1DanaJ2wQ Episode 5: Add a Gallery to your app Next up, our experts demonstrate how to add galleries for each data source, explore polymorphic lookups to the related data, and set the template fill to make the selected item stand out. Watch the episode here: https://youtu.be/lvXRITZMKU4 Episode 6: Using Forms to View, Edit and Create Data in Canvas Apps In episode six, our experts show you how to add form controls and buttons to change the state of the forms, including ViewForm, NewForm, EditForm, and SubmitForm. Watch the episode here: https://youtu.be/_LbteL8oi5I Episode 7: Better Filtering of Galleries For our seventh episode, our experts demonstrate how to get related records like we saw in the Model-driven app, add a dropdown, and use a filter function to check if the value matches or if the dropdown is blank. Watch the episode here: https://youtu.be/Fstk03c9dcg Episode 8: Security Roles and Solution Export Our experts show you how to create a Dataverse security role, assign it access to the app's entities, and export the solution as managed or unmanaged. Watch the episode here: https://youtu.be/7Qv1Qtsb5ew Episode 9: Import Your Solution, Environments, and Sharing Your App In this episode, our experts demonstrate how to import a managed solution into a new environment, add a test user to the imported security role, and share the canvas and model-driven apps with the user. Watch the episode here: https://youtu.be/PkQQKWd2H-U Episode 10: Dare 2 Compare the Two Apps! In the final episode of the series, our experts compare the two completed apps and discuss some of the pros and cons of each type of app. Watch the episode here: https://youtu.be/Njg6PaTrN2c Don't forget to check out our live Q&A session with Model-driven and Canvas app development experts, where we answer questions from our audience about app development, licensing, and more. Watch the session here: https://youtu.be/raPpNREf9EE Whether you're new to Power Apps or an experienced developer, our 10-part series on Model-driven and Canvas apps provides valuable insights and practical tips that can help you build better apps. So what are you waiting for? Check out the series today and power up your app development skills! If you need help implementing this solution or have any questions about the Power Platform, please check out our Services or fill out the contact form below. We can assist you with everything from fixing one small problem to taking on full-scale projects. We even offer mentoring and Power Platform Training if learning is your top priority. So don't hesitate to reach out and let us help you make the most of your Power Apps experience! If you prefer to learn on your own, there is a downloadable app included with this video in our YouTube training library for only $15/month!
- Paste a screenshot into SharePoint Rich Text with Power Apps
Do you want to learn how to paste screenshots into your Power Apps and then save them as files or SharePoint Rich Text? Then this video has you covered. Learn how to paste the image and then save it as a file. Once you have it as a file then you can use your text manipulation functions like Replace to automatically create the link as Rich text. Click the video below to get started! Click the link to view Shane Young's YouTube channel: https://www.youtube.com/@ShanesCows/featured Key Timestamps: 0:00 Get Started Paste a screenshot into SharePoint Rich Text with Power Apps This video covers: RichTextEditor Control, Power Automate Flow, Base64, Replace, Mid, Find, Split, Patch, If, CountRows, and With functions 1:09 Explain the SharePoint column 3:08 Demo the power App Shane demos the Power App he created and is using in this video 6:15 Show the image upload flow Shane shows the flow he created, which has a Power Apps trigger to make upload easier 7:06 Look at the formula for saving the image to the SharePoint Rich Text field 8:22 Breaking down the problem further 17:34 Talking about limitations and how to think about the harder problems Additional Learning: Power Platform University Are you looking for full, personalized Power Platform training? Do you want a mentor to help guide you on your journey? Do you prefer real world content instead of academic concepts? Then Power Platform University from PowerApps911 is for you. Learn more here . If you prefer to learn on your own, there is a downloadable app included with this video in our YouTube Resource Library for only $15/month!
- Unleash the Power of AI with Microsoft's Copilot for Power Apps: A Game-Changer in Low-Code App Deve
Hey there, app enthusiasts! Get ready to revolutionize the way you build and interact with software applications, as Microsoft has just announced their next-generation AI copilot for Power Apps! This groundbreaking innovation combines the magic of large language models and low-code development, enabling you to build applications through natural language authoring. Let's dive into the fascinating world of AI-powered app development and explore the incredible features of Copilot in Power Apps. What is Copilot for Power Apps? Microsoft's Copilot in Power Apps is actually two things, at least the way I think about it. First you have Copilot for Makers that allows you to create and modify a table using Natural Language. It can also add real sample data. Once you are happy you then click Create and it builds you an app to view and manipulate that data. Then you have App Copilot. This is a control in the Power Apps app that users can use to interact with their data. The same way you can ask ChatGPT or Bing Chat about a topic you can ask the tool. The only difference is the answer are coming from your table data you pointed it at. This opens up a new world of possibilities, empowering your users to be more productive with their own data. Building Applications with Copilot: A Step-by-Step Guide Are you ready to experience the magic of Copilot in Power Apps? Let me walk you through the process of building an app and interacting with it in new ways using this incredible tool. Follow along in my step-by-step tech walkthrough to get started! https://youtu.be/EKwR8ln2mC4 Integration of Power Virtual Agents Microsoft has also integrated AI-powered Power Virtual Agents into Power Apps, making it even easier for developers to add next-generation chatbots to their applications. With just a few clicks, you can enhance your app with a cutting-edge AI-powered bot that supports your users and offers an unparalleled experience. Availability If you want to get your hands on the preview, then sign up for the waitlist from here . Like the Bing Chat, they are rolling out slowly. But I promise it will be worth the wait. So get yourself on the list now and cross your fingers they pick you sooner than later. Conclusion Microsoft's Copilot for Power Apps is truly a game-changer in the world of low-code app development. With its user-friendly natural language authoring and AI-powered insights, app development has never been this fast, modern, or intelligent. It's time to join the AI low-code revolution and build incredible apps side-by-side with your AI Copilot in Power Apps. The future of app development starts now! So, what are you waiting for? Imagine it, describe it, and let Power Apps build it. If you want to explore more about Copilot for Power Apps then check out my exclusive interview with Clay Wesener from Microsoft, where he explains the how and why of this game-changing technology. https://youtu.be/Jpz-TasOKyk Pretty awesome conversation! Happy coding, everyone! Don't forget to share your experiences with Copilot for Power Apps in the comments below, and if you find this post helpful, be sure to share it with your friends and fellow developers.
- Power Apps Example using Canva for Design + Full Build
Let's make a pretty Power Apps app and show everything from end to end. 😍 We use Canva and Pixabay to get our imagery right. Then we use Containers to line things up nicely. Add in some conditional formatting and this PowerApps Example is about perfect. Oh, and did I mention we also show a Patching trick we haven't shown before? This video is a touch long but has a bit of everything. Click the video below to get started! Click the link below to view more videos from Shane Young: https://www.youtube.com/@ShanesCows Key Timestamps: 0:00 Power Apps Example using Canva for Design + Full Build 1:16 Power Apps Example Shopping or To-do list 2:27 Create a blank Phone app 2:50 Using Canva to create a Power Apps Screen background image and get some colors for your app 7:30 Create a gallery screen 8:16 Create a new SharePoint list from Excel 10:07 Setting up the app in a Solution with environment variables 12:41 Using Pixabay to grab images for the app and then making them clickable 15:10 Making a soft background image 20:00 Making a screen for viewing and editing the records using vertical containers and horizontal containers 33:26 Making the records editable with varRecord 41:00 Adding a new record using Patch and varRecord with Defaults Additional Learning: Power Platform University Are you looking for full, personalized Power Platform training? Do you want a mentor to help guide you on your journey? Do you prefer real world content instead of academic concepts? Then Power Platform University from PowerApps911 is for you. Learn more here . If you prefer to learn on your own, there is a downloadable app included with this video in our YouTube training library for only $15/month!
- Master the New Power Apps Barcode Reader Control: Boost Your Apps with Single, Auto, and Multi-Scan
Microsoft has recently released an updated Barcode Scanner Control for Power Apps, and it's a game-changer. With new features like single scan, automatic scan, and multi-scan capabilities, it's now easier than ever to integrate barcode scanning into your apps. In this blog post, we'll discuss some of the exciting use cases for barcode scanning in Power Apps and walk you through adding the new control to your app, along with configuring its key properties. Let's dive in! New Barcode Scanner Control in Power Apps The newly released Barcode Scanner Control in Power Apps has brought a range of powerful scanning options, making it a perfect addition to any app that requires data collection, inventory management, or asset tracking. By offering single scan, automatic scan, and multi-scan features, this versatile control can significantly improve the user experience and streamline the scanning process. Use Cases for Barcode Scanning in Power Apps Inventory Management: Easily track and manage inventory by scanning barcodes to update stock levels, product information, or location data. Asset Tracking: Effortlessly monitor and update the status of your company's assets by scanning barcodes and updating relevant details in your Power Apps. Event Management: Use barcode scanning to validate tickets, manage attendance, and streamline check-in processes at events. Retail and Point-of-Sale: Integrate barcode scanning for a seamless point-of-sale experience, simplifying product lookup and data entry. Warehouse Management: Enhance efficiency in your warehouse operations by scanning barcodes to track incoming and outgoing shipments, monitor stock movements, and optimize warehouse space. Field Service Management: Empower field service technicians with barcode scanning capabilities to quickly identify and update the status of equipment, order parts, and manage work orders. Library Management: Streamline the process of lending and returning books, tracking inventory, and managing patron information by integrating barcode scanning into your library management system. 🆘 If you need help with any of these use cases in your business be sure to check out our Power Apps Services . Everything from mentoring to break fix support and even full projects, no matter your need, we have you covered. Adding the Barcode Scanner Control to Your App To add the Barcode Scanner Control to your Power Apps app, follow these simple steps: In Power Apps Studio, open your app or create a new one. Navigate to the screen where you want to add the Barcode Scanner Control. From the Insert tab, select "Media" and then click "Barcode reader." Resize and position the control as needed. Key Properties of the Barcode Reader Control The Barcode Reader Control offers several properties that you can configure to customize its behavior and appearance. Here are some of the key properties you should be aware of: Scanning mode: Choose between SelectToScan (single scan), AutomaticallyScan, and ScanMultiple modes to suit your app's needs. BarcodeTypes: Select the barcode formats that the control should recognize, such as QR codes, EAN, UPC lables, and Code 128. Or just leave it at Auto. Power Apps hasn’t let me down yet finding the code. PreferFrontCamera : Defaults to false so it uses the rear camera. You can also change it within the Scanner interface. Bonus, you can even turn on the Flash. OnScan: Define the actions to perform when a barcode is scanned, such as updating data or navigating to another screen. Barcode Reader Control Outputs This version of the barcode reader outputs a table of the results. Assuming your control is named BarcodeReader1, you would reference the table with BarcodeReader1.Barcodes. This table has 2 columns: Type and Value. Type is the type of barcode that was read, and Value is the data from the scan. The easiest way to view your output is in a Gallery. Set the Items property to: BarcodeReader1.Barcodes, and then ThisItem.Type and ThisItem.Value will display the data you have scanned in. If you want to show a single scan in a label, use the First function like so: First(BarcodeReader1.Barcodes).Value. This will show you the scanned information. If you want to show multiple scans in a label, use the Concat function like so: Concat(BarcodeReader1.Barcodes, Value, ";"). This will show the values separated by a semicolon. Conclusion The updated Barcode Scanner Control in Power Apps is a powerful tool that can significantly enhance the functionality of your apps. With single scan, automatic scan, and multi-scan features, it caters to a wide range of use cases, including inventory management, asset tracking, event management, warehouse management, field service management, and library management. By following the steps outlined in this blog post, you can quickly add the control to your app and start harnessing its full potential. Don't forget to check out our comprehensive YouTube video tutorial on the Barcode Scanner Control for a more in-depth guide and demonstrations of its capabilities: Microsoft Power Apps Barcode Reader
- Automate your SharePoint Follow-ups with Power Automate
This guide accompanies Shane’s video which walks through how he solved some real-life problems at PowerApps911 by automating reports and reminders through Power Automate and SharePoint. The Problem The problem we’re trying to solve with this flow is we want a weekly email on leads that are due to be followed up on. The concepts in this video could be used for all sorts of challenges: follow-up on contract renewals, overdue tasks, etc. Click the video to start following along! Click the link to view more videos from Shane Young! https://www.youtube.com/@ShanesCows Getting your Data Source Ready ( 3:08 ) To begin, you’ll need your SharePoint data source ready to go. If you don’t want to play around with your live production data, you can make a copy of a live SharePoint list: Go to your SharePoint Site contents screen. Click New > List Choose “ From existing list ” This will give you an empty copy of your live list. You’ll have all the same columns, but you can create some dummy data to play around with while you’re building and learning. To best follow along with this video/guide: Add a Date and Time column to your list and name it Dateforfollowup . Set it to Date only . Create some records where this column is blank, create some records where this column has a date in the past, and create some records where this date is in the future. Add a Choice column called Status with various choice options related to status, but make sure that one option is Quote Sent . Then make sure some of your records have their Status set to Quote Sent and others are either blank or set to one of the other choices. Add a Person column and call it WhoSentQuote and add some colleagues who don’t mind you sending them a test message, or if you have the ability to create a dummy account, use that account, or do a mix of people, but you want a valid person chosen in this column for all records. Add a Single line of text column called Customer (or rename the Title column to Customer ). Make sure this field has data for all records. Add a Single line of text column called Description and make sure this field has data for all records. Once you’ve got your data source ready, let’s build the flow! Create the Scheduled flow ( 3:51 ) To begin, go to https://make.powerautomate.com and click the +Create button on the left. Give the flow a descriptive name Choose the desired start date. Choose the desired start time. Choose how often it should repeat. For this guide, we’re doing a weekly flow so keep the “Repeat every” box set to 1 and choose “ Week ”. The screen will change to show you options for a weekly flow. Deselect each day you don’t want the flow to run. You only want the desired run day to be filled in solid blue, the others should be gray. Once that’s all set, click Create . Add a SharePoint Get Items action ( 4:42 ) The first thing we want our flow to do when it runs is gather the information from SharePoint. Click + New step Search for “sharepoint get items” Choose the SharePoint “Get items” action from the results. Choose your Site from the Site Address dropdown. Choose the List where the data you want to work with lives in the List Name dropdown. Expand “Show advanced options” Let’s think about this for just a moment. The way this action is currently set up, it will go to SharePoint and retrieve all the records from the selected List. But remember the problem we’re trying to solve, we don’t want a weekly email with ALL leads, we just want the leads that need to be followed up on. While we could have Power Automate grab all the records from SharePoint and then filter that set down to what we want, that’s a lot of extra work that eats into Shane’s nap schedule, so let’s make this more efficient by having the flow only ask SharePoint for the records we want . To do this, we’re going to use the ” Filter Query ” field with our good friend ODATA queries . Use ODATA Query to filter the Dataset from SharePoint ( 5:11 ) To build an ODATA query, you need to know the system name ( 5:45 ) of the column you want to filter on. This can be different than the display name of the column. To find the system name of the column: Go to List Settings Scroll down to the list of Columns. Find the column you want to filter on, for our example, it is called “Follow Up Week”. Click on the column name . The Edit Column screen will open with the details of the column. Look at the URL for this page in your browser’s address bar. At the end of the URL, look for the portion that says &Field= What immediately follows that = is the system name of the column. So, copy or make note of that. Note: Spelling and capitalization counts! Now let’s jump back to our flow. In the Filter Query box, paste or type the column name exactly as it appeared in the previous step. After the column name type eq null For our example, the query will read: Dateforfollowup eq null This tells SharePoint to only send us records where the Dateforfollowup column is empty. Let’s do a quick sanity check to verify our query is good. ( 6:24 ) Click + New step Search for Compose Choose the Data Operation Compose action from the results. Click the Expression tab Type length() Place your cursor inside the parenthesis then click the Dynamic content tab. Choose the “ value ” placeholder from the Get items step. Click OK Save your flow Click Test Choose Manually and click Test Click Run Flow Click Done . In the flow run results, click the Compose step and verify that the number of outputs matches the number of records in your data source that have null (blank) values in the Dateforfollowup column. That gets us part of the way there, but we also want the records with follow-up dates that are within this week, because we want the reminder to alert us to records that don’t have follow up dates plus records that have follow ups scheduled for this week. Let’s go back to our Get items step and add to our filter query to get everything we want. ( 7:37 ) Put your flow back in Edit mode and click on your Get items action. Go to the end of your Filter Query and press the spacebar Now we’re going to use the operator or to add another query to this filter. Type or paste your column name again followed by lt for less than and press the spacebar again. Because we want to know if the date in that column is within this week, we need to do some math, and not just any math, we want to do some date math. So in the box that is hovering to the right, click the Expression tab. The expression should be addDays(utcNow(),6,’yyyy-MM-dd’) Let’s break that down. addDays is a function that does just what it says, it adds days to a given date. The first argument in addDays is our base date, the day we want to add to, so we want this to always be the date that the flow is running, so we’re using utcNow() , which always returns the current date. Then we’re just looking for days that fall this week, so our next argument is 6 . And then finally, we want the result to be formatted the way ODATA wants it, so our last argument is ‘yyyy-MM-dd’ Click OK That places our expression as an expression block in our query. But when you use dates in ODATA, it wants the date to be wrapped in single quotes, so place a single quote on both sides of the expression block. Do another sanity check to make sure your additional filter is working correctly. So, test run your flow and expand the Compose step and make sure the resulting number of records is correct compared to what is in your data source. Next, we need to add more filtering to our query. ( 10:04 ) Go back to Edit mode and wrap your whole Filter Query in ( ) because we want that whole query to be true, but in addition to that, we also need another query to be true, so type and after the closing parenthesis and then get ready for an additional query because we want the records we’re getting from SharePoint to have a status of Quote Sent . In your Filter Query, after the and which follows your first two queries which are wrapped in parentheses, type or paste the name of your Status column then type eq ‘Quote Sent’ Your query should look like: (Dateforfollowup eq null or Dateforfollowup lt ‘addDays-expression-block’) and Status eq ‘Quote Sent’ If you want, do a sanity check again by testing your flow and checking the Compose’s output. Let’s say you decide you want to include the additional status of “Discovery” in your dataset, you would go to the end of your query and type or Status eq ‘Discovery’ then you would wrap everything after the and in ( ) . Your query is saying "I want records where this first group of queries renders a true AND where the second group of queries renders a true". Any time you want to include other conditions, you would just follow this principle of grouping column checks with or operators and then linking that group of queries to the main query with an and operator. So now our dataset retrieval is good, if you want, you can delete the Compose step. (Although it doesn’t hurt to keep it in there for troubleshooting.) Select Data Operation to Get All of the Email Addresses ( 13:53 ) Now we want to move on to grab the email addresses that the weekly message needs to go to. Click + New step Search for Select and choose the Data Operation Select action from the results. The From box is where you will specify the dataset we got back from SharePoint, so we’ll choose value from the Dynamic content available from that step. The key field for the Map section is what we want to call the data we are pulling out of that dataset, you’re free to call this anything you want, but we’re calling it EMAIL in our example. For the value associated with the EMAIL key, we want to use the properties available to us because our WhoSentQuote field is a Person field. So, we don’t just want to pick the WhoSentQuote column, rather we want to pick WhoSentQuote Email , because we only want the email property of the person specified in this field. The Select action gets us a sub-table with only the email addresses of the people found in the WhoSentQuote field of the records SharePoint returned to us. Some of those records are going to have the same person in the WhoSentQuote field, so we don’t want to bombard them with a flurry of emails every week; we need to whittle the table of email addresses down to just the distinct addresses. How do we do this? We do this with the Union expression. Let’s take a look. Getting Distinct Items in Power Automate flow using Union ( 15:13 ) The first thing we need to do is loop through that sub-table of email addresses. Click + New step Search for apply to each . Click the Control Apply to Each action. In the “ Select an output from previous steps ” box, click the Expression tab and type union() Place your cursor inside the parentheses , click on the Dynamic content tab and choose the Output of the Select step, add a comma and then click the Output of the Select step again. So your final expression should look like this: union(body(‘Select’),body(‘Select’)) Click OK Inside your Apply to Each loop, click Add an action and add a Compose action. For the Input of your Compose 2 action, scroll down to the bottom of the Dynamic content and choose the Current item from this Apply to Each step. Do a test run to verify. There should be 1 Compose card inside this Apply to Each loop for each distinct email address found. Notice that the data for the result is inside curly brackets, that means the Select is returning the data as a record, and we just want the text of the email address from within that resulting record. Go back to Edit mode. Click on Current item inside your Apply to Each loop’s Compose action. Press CTRL + C to copy this block. Now on the right, switch to the Expression tab. Paste the info you just copied into the expression box. Delete the @{ from the beginning of the expression and delete the } from the end of the expression. So the expression should now be items(‘Apply_to_each’) which returns the record of the current item in the loop. But as we said, we don’t want the whole record, we just want the email address text. So at the end of the expression type ?[‘EMAIL’] This is very similar to in Power Apps using the . at the end of an object to specify a property of the object, but in Power Automate, instead of a . you use a ? and wrap the desired property in [‘ ’] Your expression should be: items(‘Apply_to_each’)?[‘EMAIL’] Copy this expression, then click OK . Still within the Apply to Each loop, click Add an action . Now we want to filter the dataset we received from SharePoint down to just the records containing the current item in the loop’s email address. Search for Filter . Click the Data Operation Filter action. From should be set to the value of the Get items step. For the first value in the comparison logic, choose the WhoSentQuote Email property. For the second value in the comparison logic, click the Expression tab and paste in the expression you just copied. Click OK Now we just need to build a table of the information for our email body and send the email. Let’s keep going! Create HTML Table Data Operation to Build Our Email Body ( 21:00 ) Still inside the Apply to Each loop, click Add an action Search for Create HTML and choose the Data Operation Create HTML Table action. For the From on this action, choose the Body of the Filter array step. Click the Show advanced options link to expand for more options. Change the Columns drop-down from Automatic to Custom . The headers for these columns can be whatever you want, they don’t necessarily have to match the column names of your SharePoint List. But you will want to look up and make note of the system names for these columns, they will be needed for the Values. For our example, we want a header for the following: Customer Status FollowUpDate Description For the Values of these columns, we don’t just want the associated columns from the Get Items step from SharePoint. We actually want the associated columns from our Filter Array step. To do this, we need to use an expression. Click the Value field next to our Customer header. In the box to the right, click Expression . Your expression will begin with Item()? Followed by the system name of the associated column wrapped in [‘ ‘] . So for our example, our Customer column was originally the Title column so the expression needs to be: Item()?[‘Title’] Click OK Repeat steps 7-10 for the remaining columns, using the appropriate system names for each column. Hold on though! Remember that your Status column is a Choice column. You’ll need to treat that one differently. If you use the expression Item()?[‘Status’] it will return the whole record of the selected choice inside the choice column. We just need the value, so for the Status column, the expression should be Item()?[‘Status/Value’] Now our HTML is ready to go, all we need to do is have the flow send an email. Send the Follow-Up Email with the Outlook Connector ( 25:20 ) Still within our Apply to Each loop, choose Add an action . Search for Outlook send Choose the Office 365 Outlook Send an Email (V2) action. The To: field will be the expression we used earlier in our Filter Array step. But think about building this flow in 2 modes: Testing and Production. When you’re testing, you might fire this flow off 5, 6, or 50 times to fine tune the output. You don’t want to pester the person who will ultimately be receiving the email while you’re testing. So let’s build this step first for our testing phase, and then we’ll explain what to do when you’re ready to move this flow to Production. Since we’re testing, let’s hard-code your own email in the To: field. In the To: field, search for yourself, pick the result. Give the Subject a descriptive name, like Leads for Follow up or something to that effect. In the Body of the email, click the Output of the Create HTML Table step. Press Enter and type: Email would have went to: Then click the Expression tab to the right, and use the expression to get the email we filtered by: items(‘Apply_to_each’)?[‘EMAIL’] Click OK Save and Test run the flow and you should receive the emails for any records that need followed up on, and that line at the bottom should tell you who each email should have gone to. When you are ready to put this flow into live production use, remove the “Email would have went to: “ and items expression from the body of the email and put the items expression into the To: field. Additional Learning: Power Platform University Are you looking for full, personalized Power Platform training? Do you want a mentor to help guide you on your journey? Do you prefer real world content instead of academic concepts? Then Power Platform University from PowerApps911 is for you. Learn more here .
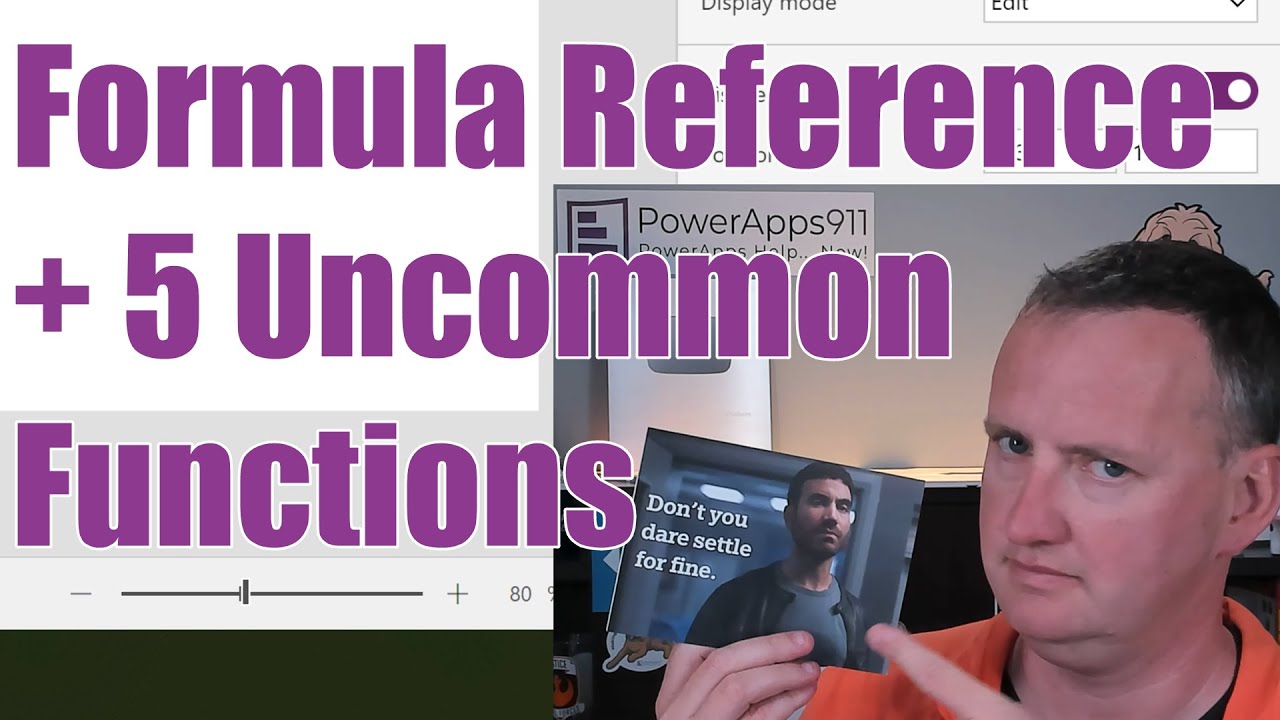
- Power Apps formula Reference + 5 uncommon functions
The PowerApps formula reference is the list of all Power Apps functions and how to use them. If you are a new learner, it is a must bookmark. And what fun would it be to show you the Power Apps formula reference without playing with some of the PowerFX functions. So we demo five functions that aren't used enough in my opinion. With, Sequence, Char, IsMatch, and Coalesce are all covered in a bit more detail. Helping you to become effective Power Apps maker. Nothing deep or complicated, just enough to get you in and productive. Click the video below to get started! Click the link below to view Shane Young's YouTube channel: https://www.youtube.com/@ShanesCows Key Timestamps: 0:00 Get Started Power Apps formula Reference & 5 of Shane's favorite functions no one uses 1:00 What is the Power Apps formula Reference Click here Shane shows you the "number one" piece of documentation - where he begins all of his training courses 3:47 Using the Sequence Power Apps function Sequence is a function for returning a number or table 5:28 Bonus function: AddColumns 8:01 Bonus function: TimeValue 9:04 Char Power Apps formula Demo of Office365Users.MyProfileV2 function included! 12:32 The With function in Power Apps 15:05 IsMatch for data validation in Power Apps 18:34 Using Coalesce Power Apps function to return the first non blank value Additional Learning: Power Platform University Are you looking for full, personalized Power Platform training? Do you want a mentor to help guide you on your journey? Do you prefer real world content instead of academic concepts? Then Power Platform University from PowerApps911 is for you. Learn more here . If you prefer to learn on your own, there is a downloadable app included with this video in our YouTube Resource Library for only $15/month!
- Using the Power Apps Search Pane
The Power Apps Search Pane was a great addition to the Power Apps Maker Studio. This post, which pairs with Shane’s video on the subject, will cover the usage and capabilities of the tool. You’re going to learn how to use the Search Pane to find collections, variables, controls, formulas, components and many other elements throughout your apps. You’ll also learn how to filter your results, and even a bit about regular expressions (regex). We’re not going to get too crazy, but we just want to highlight this solid feature that makes troubleshooting and updating your app WAY easier! Shane's YouTube Video on the Subject Click the link to check out Shane Young's YouTube channel: https://www.youtube.com/@ShanesCows Where to find the Search Pane ( 1:30 ) In Power Apps Studio, Create a new app. The Search Pane is ‘on’ by default for new apps, so you can quickly and easily find it, by looking on the left edge of the screen. The vertical column of icons serves as navigation to the various elements that make up your app. From the top-down there’s the hamburger menu icon used for expanding and collapsing the labels of these shortcuts. Below that is Tree view which shows your screens and all controls that have been added to those screens. Below Tree view you’ll find Insert, which is an alternate way to add controls to your app (the other being the + Insert button in the top toolbar that used to be the ribbon). Next is the Data icon, where you go to add connectors for data sources. This is followed by Media where you can upload or delete pictures, videos and audio files to your app to use as elements. Next is the relatively new Power Automate button, which will allow you to build and update your Power Automate flows right within the app maker experience. Then you’ve got Advanced tools which contains tools for monitoring and testing/debugging your app. Finally, at the bottom of this group of icons is the Search icon. Doing a basic search ( 2:00 ) With the Search pane open, type in a search term. The results will be broken down by the type of element where matches are found. So variables that contain your search term will not only be grouped together in the results as Variables, but Power Apps will also tell you whether the result is a Global variable or a Context (local) variable. It will go on to highlight results based on if they are Collections, Data sources, Media, Flows, Components or Screens. Filtering search results ( 2:18 ) Let’s say your search term returns hundreds of matches across all these categories. You can click the filter button beside the search box to change it so you’re only shown matches from your desired element type. In that filter menu, you can also fine tune your search by making it match the case of how you typed the search term, or you can force it to match the whole word so it will only show results where your search term is present on its own, instead of the default behavior where results also contain matching words that are part of another word. For example, if my app has many elements with the word ‘test’ in them and I search for ‘test’, the default behavior would show me results like my data source “Security Test” as well as my “Law2TEST” data source. But if I turn on Match whole word, the only result would be “Security Test” because that’s the only data source that has ‘test’ by itself. And if I go one further and turn on Match case, it won’t show me any results, because the term I typed was all lower-case and none of my elements have the word ‘test’ as all lower-case. Using search results ( 3:04 ) In the list of results, clicking on a variable result will take you to its entry on the Variables screen, where you can then see the current value of the variable, as well as where it is defined and used throughout the app. But what if your result is a collection? Clicking on a collection result takes you to the normal Collections screen which allows you to see the data inside the collection, but that’s not very helpful for finding where the collection is declared. But if you see a collection result, change your search term to the name of that collection result and see what happens. Under the Screens results, you will see the Screen, control and property where the collection is being declared. Clicking on this result will take you straight to the formula where the collection is being built. Using regular expressions (regex) for advanced searching ( 7:34 ) The basic search in the Search Pane does not allow you to combine search elements. So you can’t type in “height Or width” and have it show you all results that are either ‘height’ or ‘width’. That doesn’t meant you’re dead in the water though. If you click on the filter button, the very bottom option on the menu is “Use regular expression”. By toggling on this filter setting, you can now enter regex syntax into your search box. So you could then type “height|width” which would give you results that match either ‘height’ or ‘width’. While understanding regex is outside the scope of this article, there will be a link to a page from Microsoft that explains it and provides examples of regex syntax. If you need a little help figuring out regex, that'd be a great use of ChatGPT to help you form your queries. Don't know what that is? Check out our article on ways to use ChatGPT to help you! What doesn’t it find? ( 6:08 ) As we’ve become more familiar with the Search Pane, we have noticed some things that don’t show up in the results. I wouldn’t necessarily call these all limitations, but they are simply cases where your search term might be technically present in an app and not show up as a result. For example, if my app has a Text input control and I put my app in Preview (Play) mode and then type ‘test’ into that text input control, that instance of the word ‘test’ will not show up in the search results. Similarly, the search tool will not look inside your variables/collections for your search terms. So if your variable or collection contains the word ‘test’ in its values, that won’t show up in the results. UPDATES During Shane’s video on this subject, he pointed out that the Search pane could not be used for bulk renaming/replacing of search term matches. In the time since that video was published, Microsoft has added the Replace function to the Search Pane as a tab right next to Find. In the Replace tab, you enter a search term and this time it will only search Variables, Collections and Screens (but you retain the fine-tuning options of Match case, Match whole word and Use regular expression). Then there is a text box below the search term where you type in the word or phrase you want to replace matches with. You’ll also notice that the search results in this tab have checkboxes next to them, so you can tell it to only replace the matching terms in some cases, but leave others alone. Pretty slick! Also, at the time of the video, Search Pane was a Preview feature that was ‘on’ by default for new apps, but needed to be manually added to older apps. This is no longer the case. This Search Pane experience is now out of Preview and is present in all apps, regardless of when they were built. Additional resources Regular Expression 2 (re2.h) syntax (Microsoft Learn) If you prefer to learn on your own, there is a downloadable app included with this video in our YouTube Resource Library for only $15/month!
- Add Collapsible Menus to Your Power Apps for a Sleek User Experience
Whether you call them Hamburger menus, Flyout menus, Filtering menus, or Collapsible menus, they all serve the same purpose. When you want to hide options from the screen until the user needs them, these menus are your go-to solution. Screen space is precious, and being able to hide menus or inputs is incredibly helpful. With Power Apps Canvas Apps, these types of menus are not "built-in," meaning if you want one, you have to build it yourself. The good news is that, thanks to layout Containers, they're not difficult to create. And by incorporating a Timer control, you can even add a touch of animation for good measure. For a step-by-step overview, check out this video Power Apps Hamburger Menus , where we take you from nothing to a working flyout menu. It's a straightforward approach to this versatile concept. At a high level, here's how Collapsible menus work: • Add a container and place whatever controls or buttons you want to be in the menu inside it. • Place an icon on the screen to represent your menu. Set the color to change depending on whether the menu is shown or hidden. • To show and hide the menu, use a context variable. Set the OnSelect property of the Icon to UpdateContext({varShowMenu: Not(varShowMenu)}) – this toggles the variable from True to False with each press of the icon. • Set the container's Visible property to varShowMenu. Now, if you want to add some fancy animation: • Add a Timer control to the screen. Assume the control is named Timer1 for this example. • Set the Duration to the desired time you want the menu to spend showing (in milliseconds). 500 (half a second) feels about right. • Set the Reset property to Not(varShowMenu). • Set the Start property to varShowMenu. • Now, go back to your container and note its current height (e.g., 200). If that's your current height, change the Height to 200 * Timer1.Value/Timer1.Duration. Voilà! Now you have a hamburger menu that smoothly shows when users click on the icon and closes when they click again. With this basic concept in your skillset, you can customize it as you see fit. In the video https://youtu.be/x1rGIJmUG7c, we also demonstrate how to add a visual indicator that the data is currently filtered and ways to remove the filters with a simple click. Here are some example use cases for these types of menus: 1. Dashboard Navigation: In a Power Apps dashboard application, a hamburger menu can be used to provide quick access to various sections or pages within the app, such as sales data, customer information, or inventory management. 2. Task Management App: In a task management app, the hamburger menu can be used to display different filtering and sorting options, allowing users to quickly organize and view tasks based on priority, due date, or project. 3. Document Management: In a document management app, the hamburger menu can provide access to different document categories, recent files, or favorite documents, making it easy for users to find and access the files they need. 4. Employee Directory: In an employee directory app, the hamburger menu can be used to display search filters and sorting options, enabling users to find employees based on criteria such as department, location, or job title. 5. Event Management: In an event management app, the hamburger menu can be used to access different sections such as event details, guest lists, and task assignments, providing a central hub for managing all aspects of an event. 6. E-commerce App: In an e-commerce app, the hamburger menu can be used to display product categories, shopping cart, and account information, streamlining the shopping experience for users. 7. Learning Management System (LMS): In an LMS app, the hamburger menu can provide access to course catalogs, progress tracking, and user profiles, making it easy for learners to navigate through the available educational resources. 8. Customer Relationship Management (CRM): In a CRM app, the hamburger menu can be used to access various modules such as leads, contacts, and opportunities, allowing users to quickly switch between different aspects of customer management. 9. Expense Tracker: In an expense tracking app, the hamburger menu can provide access to different expense categories, reporting tools, and account settings, making it easy for users to manage their finances. 10. Social Networking App: In a social networking app, the hamburger menu can be used to display user profiles, friend lists, and notification settings, providing a centralized location for users to manage their social interactions. If you need help implementing this solution or have any questions about the Power Platform, please check out our Services or click Contact Us. We can assist you with everything from fixing one small problem to taking on full-scale projects. We even offer mentoring and Power Platform Training if learning is your top priority. So don't hesitate to reach out and let us help you make the most of your Power Apps experience!
- Power Apps working with Collections – April 2023
Shane has updated one of his most popular videos on working with collections. In this post, we’ll introduce you to everything you need to know about Collections in Power Apps. From creating your first collection, to using the Collect function to shape and display your data, this is a good stop for new and experienced Power Apps users. See the video here . Video Chapters: 0:00 - Introduction 1:31 - The Collect function to create your first Power Apps Collection 3:19 - Collecting multiple records at once 3:56 - Using a gallery to display the Collection data 4:24 - The Clear function to empty the collection 5:00 - The ClearCollect function to empty and update the collection 6:36 - Utilizing Input Controls to populate the collection 9:43 - Real-world examples of using Collections in Power Apps 11:45 - Caching Data Source using Collections 14:40 - Delegation Considerations 15:15 - Writing data from a Collection to the data source 17:24 - Removing an item from a Collection What is a Collection and why use them? A collection is a special type of variable known as a table variable. A collection captures rows and columns of data vs. one item of data. There are two reasons why we use them: one, to collect up a bunch of data before sending it to our data source, and two, to cache information so we don’t have to keep going to our data source to grab it. Since a collection is a table of data, and our data source is usually a table of data, collections give us an efficient way to interact with our data in Power Apps (even offline). How do you create a collection? One way to create a collection is to use the Collect function. The Collect function can be used with the OnSelect property of a button control. With the app in preview mode, selecting the button with the formula below will add a record with two fields (Name and PN) to a collection called colStuff each time it is selected: Collect(colStuff, {Name: “Lori”, PN: 12}); If you press/hold your Alt key first, after pressing the button control several times, you can see how the collection grows: You can add another record to the Collect function in your formula to add a second record each time like this: Collect(colStuff, {Name: “Lori”, PN: 12}, {Name: “Tom”, PN: 33}) Each time you edit the formula for your Collect, you’ll notice that the collection is reset, but selecting your button control multiple times populates the collection with two record entries each time it is pressed: Next, we can insert a gallery control to view the collection, because the collection is a table of data and that’s the type of data that a gallery is looking for. We tell our gallery that the data source is the collection (you can check your Items property to make sure your collection name is displayed there). We can modify the Layout and adjust our fields to display what we want. Then we can adjust the fields inside of the gallery to show the items we want from our records. In this case one field displays the “Name” and the other displays the “PN”. The Clear function We can use the Clear function to erase all the items from our collection. In the demo, we create a second button and add a formula to clear the collection, in this case: Clear(colStuff). Selecting our second button erases the collection and causes the gallery to go blank. So, while Collect adds records to the collection, Clear empties the collection of all records. The ClearCollect function The ClearCollect function first empties or clears our collection, then it adds records. If we add another button to our app, we can demonstrate what the ClearCollect function does with our collection. We define a collection that we’re going to clear and then add data to, then we specify what data to add (or collect) immediately after the collection gets cleared. ClearCollect(colStuff, {Name: “Buddy”, PN: 1}) ; If we select the button with this formula, each time we select it we’ll only see the one record we are collecting. ClearCollect erases the collection, then adds our 1 record, no matter how many times we select it. However, if we go back to the Collect button and select it, the collection we created with our ClearCollect button does not get wiped, and we can add more values to it. Selecting our Collect button does not wipe the collection, it continues adding values each time we press it. We want you to understand the behaviors of these different functions so you can decide which function you want to use for your app. How to use input controls to populate the collection You probably won’t want to hard-code the details of your collection, you’ll probably want your users to be able to input data into your collection. To do that, you can use some Text Input controls with your Collect button. In Shane’s example, he uses the inpName.Text as the Name value and Value( inpPN.Text ) as the PN [phone number] value. We use the Value() function so that Power Apps understands that we want to put a number in that field instead of a text value, so the Value() statement declares that. Notice now that his Collect statement becomes dynamic, according to what is entered into the Text Inputs. Collect(colStuff, {Name: inpName.Text, PN: Value(inpPN.Text)}) Notice how each time we change the text inputs and select the collect button, it adds one record at a time. We must change the inputs each time, but we have now made it so that users can input data. Once you define your collection, it doesn’t care how it gets the data. It doesn’t matter if we use our original Collect button or the new collect button. It can be hard coded, or manually entered. It could use a formula, too, such as 12+12 for the phone number. If we provide Power Apps what it wants, we can give it whatever collection information we want. “Don’t overthink these things. They just want what they want. Give them what they want, and they will be happy.” – Shane Young What are some Real-world examples of using Collections in Power Apps? An expense report app is one place where you would use a collection, as you categorize individual expense items. In the demonstration Shane enters the Expense Item and the Expense Cost, which are Text Inputs. When he selects the ‘Save’ icon, he’s simply adding these two fields into his collection. You can get a peek at how Shane builds this particular app here . Likewise, you could build a collection based on items you select from a gallery. In this case, the OnSelect property of an item in the Gallery itself would Collect that item into the collection, one item at a time. Caching Data Source using Collections Another application for a Collection is for caching data. In this example below, we have two different data sources. The Gallery itself is using the Employees list, and we have added a Manager field which uses a LookUp to the Departments list to match this particular item with the employee’s manager. This is a terribly inefficient way to display data because each item in the Gallery must make a data call to the Departments list. So, if you have a hundred different items in your gallery, each one does a separate look-up from the other list (100 separate lookups). Do not set your gallery up to do it this way. Instead, we can use a single Collect function to call all the items from the Departments list, since it is relatively small, and create a collection to use for the LookUp. Using ClearCollect, we can pass records from an entire table into our collection. In this case, we pass the entire contents of the SharePoint list called Departments into our Collection called colCow with this formula: ClearCollect(colCow, Departments); Since your collection resides in the app, it doesn’t have to make expensive calls to your data source to get the same information. Just one call gets all the data and loads it into memory inside of the app. Now we can replace our costly lookup on the label in our gallery to connect to our collection, without the external calls to the data source: LookUp(colCow, Title = ThisItem.Department).Manager) This technique provides the same results but provides them much faster since we’re checking memory and not making a hundred calls to our data source. Delegation Considerations You need to keep in mind that Collect and ClearCollect are not delegable functions so if the list you’re trying to cache is larger than your delegation limit, you will not be able to bring in all the items (which, by-default, is 500 items, 2000 max). Watch the video on delegation several times (Shane says watch it “four times”) if you don’t understand what that is all about. You’ll know delegation issues by the blue lines and yellow warning signs that your app displays for you. You cannot cache a list that contains 10,000 items. There are some techniques people try to stack collections in their app to get more than 2000 items – don’t do that! Don’t ever build collections that are more than 2000 items if you can avoid it. It is irresponsible to build Power Apps if you don’t understand delegation. – Shane Young Writing data from a Collection to the data source Another thing we can do with our Collection is to write the entire thing to our data source. To do this, we change the syntax of our collection statement. We would collect to our data source instead of from it, like this: Collect(DataSourceName, CollectionName) The formula above takes whatever is in the collection and saves it to our data source. The caveat is that the data structure from our collection must match our data source data structure for this to work, think about required columns matching up. The implications are that you can take bulk data and efficiently send it back to your data source. If you want to learn some other techniques for sending bulk data from Power Apps to your data source, be sure to check out this video on Performance Optimization . Removing an item from a Collection Remember that a collection is simply a table of data. If we want to remove an item from the table, we can use the Remove function. In this case, Shane has added a trash icon to the gallery containing the collection and the OnSelect property of the icon is: Remove(colStuff, ThisItem) With the app in preview mode, selecting this icon removes that item from the gallery. It doesn’t remove the item from the data source, just the collection. With a collection you can use all the table functions, including AddColumns, ShowColumns, Remove, etc. to shape the data in your collection to get it exactly what you want. A final caveat, you cannot use collections with forms, and Shane is not going to teach you shenanigans for how you might possibly achieve that.🙂
- Power Apps Random Number Generator with No Duplicates
Learn how to build a Bingo Caller app that creates all of the bingo balls, and then shuffles them, randomly draws one, and helps you manage the whole bingo game. Playing bingo at the holidays is a family tradition and this app just makes it all that much cooler. So much to learn. Click the video below to get started now! Click the following link to view Shane Young's YouTube channel: https://www.youtube.com/@ShanesCows Key Timestamps: 0:00 Power Apps Random Number Generator Video 2:16 Overview of the working Bingo Caller App 4:19 Generate 10 unique numbers from 1 to 20 10:01 Creating Bingo Balls with Power Apps functions 13:45 Using ForAll to more efficiently build our collection 17:34 Overview of the rest of the app 22:53 How to add Sound to your app Additional Learning: If you need help implementing this video or have any questions about the Power Platform, please check out our Services or fill out the contact form below. We can assist you with everything from fixing one small problem to taking on full-scale projects. We even offer mentoring and Power Platform Training if learning is your top priority. So don't hesitate to reach out and let us help you make the most of your Power Apps experience! If you prefer to live on your own, there is a downloadable app included with this video in our YouTube training library for only $15/month!